
Building a visually appealing website is crucial but understanding how visitors find your site and interact with it is equally important . This is where Google Analytics comes into play! This blog post will guide you through the process of adding Google Analytics to your Visual Composer website, step by step.
Let's dive in!
- Set Up Google Analytics
- Add Google Analytics to Your Visual Composer Website
- Verify the Integration
- Final Thoughts
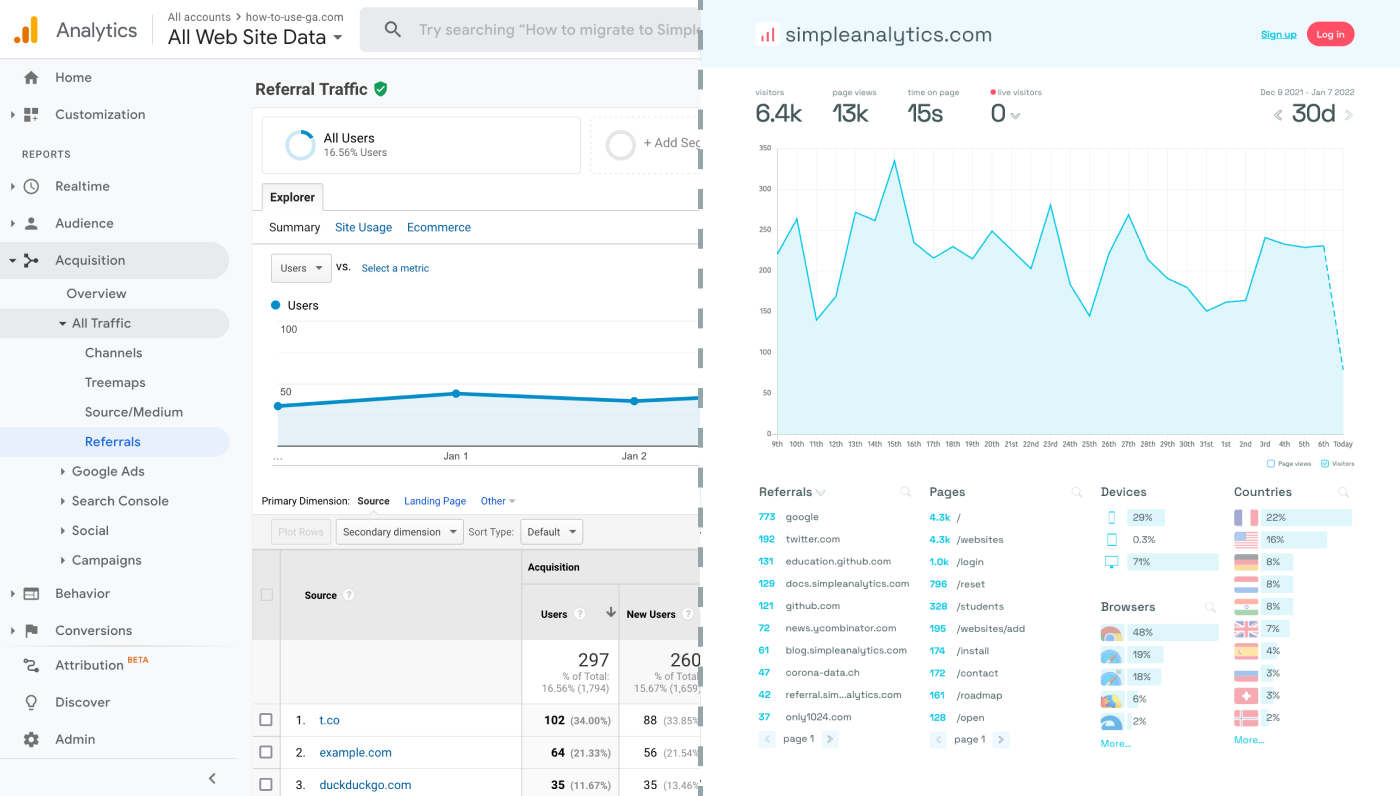
Before we dig in you need to know that Google Analytics is complex and a bit clunky. There are other options that give you the same insights in a slick and straightforward dashboard.
Simple Analytics is one of them. A privacy-friendly and simple analytics tool - just the insights you need in a straightforward dashboard. (And its also free yes).
All right, now let's get into answering your question!
Set Up Google Analytics
If you haven't already set up a Google Analytics account for your website, you will need to do that first. Here's how to get started:
- Create a Google Analytics Account: Visit the Google Analytics website and sign in with your Google account. If you don’t have one, you’ll need to create it.
- Set Up a New Property: Follow the instructions to create a new GA4 property, selecting "Web" as your platform type.
- Obtain Your Measurement ID: After setting up your property, Google will provide you with a Measurement ID (formatted as "G-XXXXXXXXXX"). Note down this ID, as it's necessary for integrating GA with your Visual Composer website.
Add Google Analytics to Your Visual Composer Website
Integrating Google Analytics with Visual Composer is quite straightforward:
- Access Your WordPress Dashboard: Log in to your WordPress site and navigate to the dashboard.
- Install Insert Headers and Footers Plugin: you can directly edit your theme’s header.php file to include the GA tracking code, but using a plugin like "Insert Headers and Footers" is easier.
- Insert Your GA Tracking Code: Go to "Settings" > "Insert Headers and Footers" in your WordPress dashboard. Paste your entire Google Analytics tracking code into the "Scripts in Header" box. This code snippet should include your unique Measurement ID and is provided by GA during the setup process.
- Save Your Changes: After pasting the tracking code, save your changes. The plugin will now insert the GA tracking code into the header of every page of your Visual Composer website.
- (Optional) Create New Properties: create a new and different property for every website you want to track and insert the corresponding tracking code. This allows GA to collect data individually for each website.
Verify the Integration
After adding the Google Analytics tracking code to your website, it’s important to ensure that it's correctly tracking your site. Visit your website to generate some traffic, then log into your Google Analytics account and navigate to the "Realtime" report to see if your activity is being tracked.
Final Thoughts
Adding Google Analytics to your website can give you great insights. However, ask yourself: is Google Analytics the right tool for you?
GA is an overpowered solution for straightforward analytics. If you're looking for a simple and intuitive dashboard with the insights you need, there are better alternatives.
If this resonates with you, feel free to give Simple Analytics a spin. You just need to add the script to your app and off you go. This takes about one minute- and there is a free version as well!
Enjoy!