
Integrating Google Analytics into a Next.js application enables you to monitor user behavior, which is key to improving user experience with your app. Given Next.js's server-side rendering capabilities, the approach is slightly different from client-side-only frameworks. Here is how to add GA step-by-step.
Let's dive in!
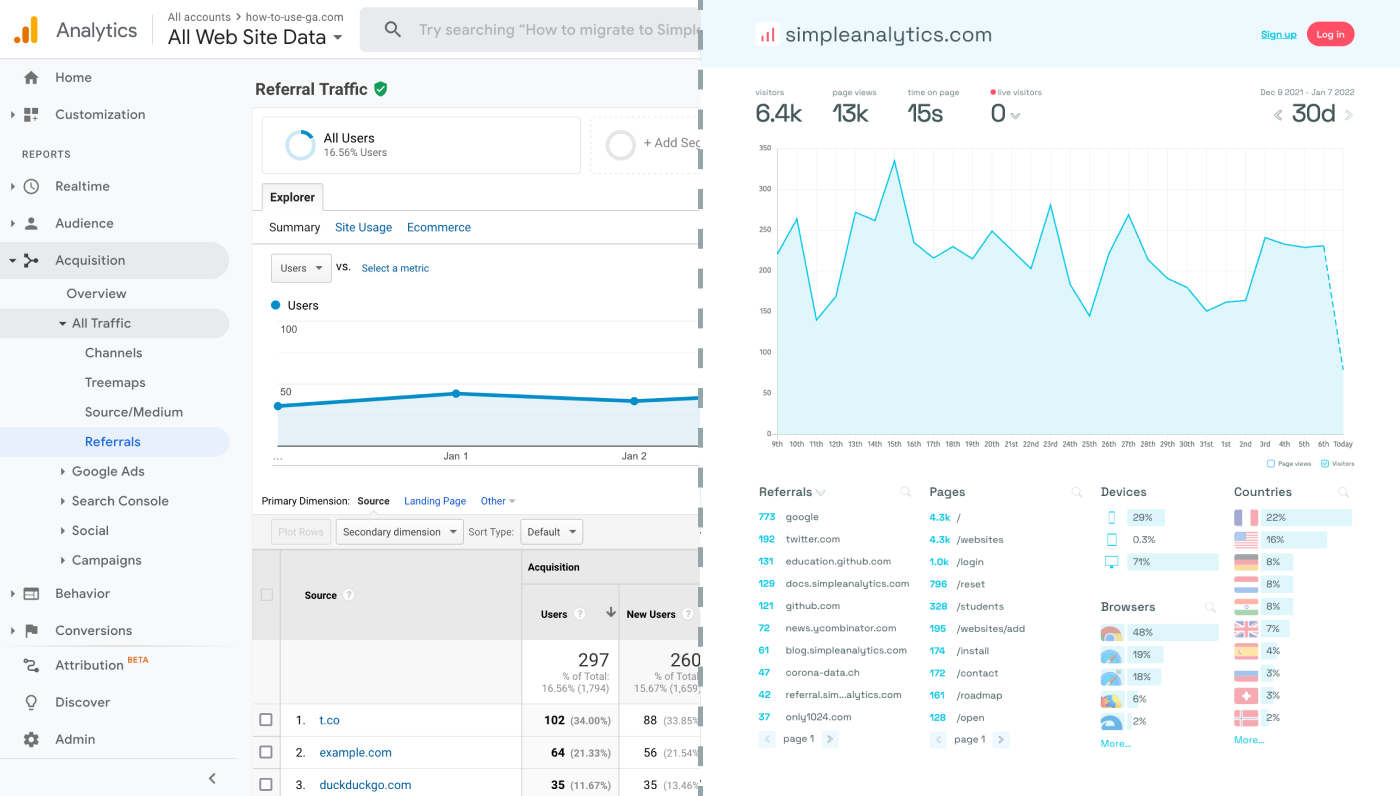
Before we dig in you need to know that Google Analytics is complex and a bit clunky. There are other options that give you the same insights in a slick and straightforward dashboard.
Simple Analytics is one of them. A privacy-friendly and simple analytics tool - just the insights you need in a straightforward dashboard. (And its also free yes).
All right, now let's get into answering your question!
Integrating Google Analytics
Set up Google Analytics
- Log into your GA profile (or create one, if you haven't already)
- Create a GA property for your app.
- Inspect the property and note down your Measurement ID. You will need it later.
Create a GA Module
Create a JavaScript module for GA. This module will handle the initialization and tracking of page views and events. Create a file like lib/ga/index.js:
export const GA_TRACKING_ID = 'YOUR_MEASUREMENT_ID';

export const pageview = (url) => {
  window.gtag('config', GA_TRACKING_ID, {
    page_path: url,
  });
};

export const event = ({ action, category, label, value }) => {
  window.gtag('event', action, {
    event_category: category,
    event_label: label,
    value: value,
  });
};
Make sure to replace YOUR_MEASUREMENT_ID with your actual Measurement ID.
Add the GA Script to Your Application
In your _document.js file (create one in your pages directory if it doesn't exist), include the Google Analytics script:
import Document, { Html, Head, Main, NextScript } from 'next/document'
import { GA_TRACKING_ID } from '../lib/ga'
export default class MyDocument extends Document {
render() {
return (
<Html>
<Head>
{/* Global Site Tag (gtag.js) - Google Analytics */}
<script
async
src={`https://www.googletagmanager.com/gtag/js?id=${GA_TRACKING_ID}`}
/>
)
}
}Again, make sure to replace 'GA_TRACKING_ID' with the correct value from your own ID.
Track Page Views
In _app.js, use the pageview function to track page views:
import { useEffect } from 'react'
import { useRouter } from 'next/router'
import * as ga from '../lib/ga'

export default function MyApp({ Component, pageProps }) {
  const router = useRouter()

  useEffect(() => {
    const handleRouteChange = (url) => {
      ga.pageview(url)
    }

    router.events.on('routeChangeComplete', handleRouteChange)

    return () => {
      router.events.off('routeChangeComplete', handleRouteChange)
    }
  }, [router.events])

  return <Component {...pageProps} />
}
Implement Event Tracking
Wherever you need to track custom events in your application, import the event function from your GA module and use it:
import * as ga from '../lib/ga'

ga.event({
  action: 'submit_form',
  category: 'Contact',
  label: 'Contact Form',
  value: 'User submitted a contact form'
})
Test and Deploy
Test your integration thoroughly, ensuring that page views and events are being tracked as expected. Deploy your application and monitor the Google Analytics dashboard.
(Optional) Create New Properties
To track multiple apps, create more GA properties and use the corresponding Measurement IDs. This prevents GA from conflating the data.
Final Thoughts
Adding Google Analytics to your NextJS app can give you great insights. However, ask yourself: is Google Analytics the right tool for you?
GA is an overpowered solution for straightforward analytics. If you're looking for a simple and intuitive dashboard with the insights you need, there are better alternatives.
If this resonates with you, feel free to give Simple Analytics a spin. You just need to add the script to your app and off you go. This takes about one minute- and there is a free version as well!
Enjoy!