
While SharePoint offers a range of built-in analytics tools, integrating Google Analytics can provide deeper insights into how users interact with your site. This blog post will guide you through the process of adding Google Analytics to your SharePoint site, step by step.
Let's dive in!
- Set Up Google Analytics
- Add Google Analytics to Your SharePoint Site
- Verify the Integration
- Final Thoughts
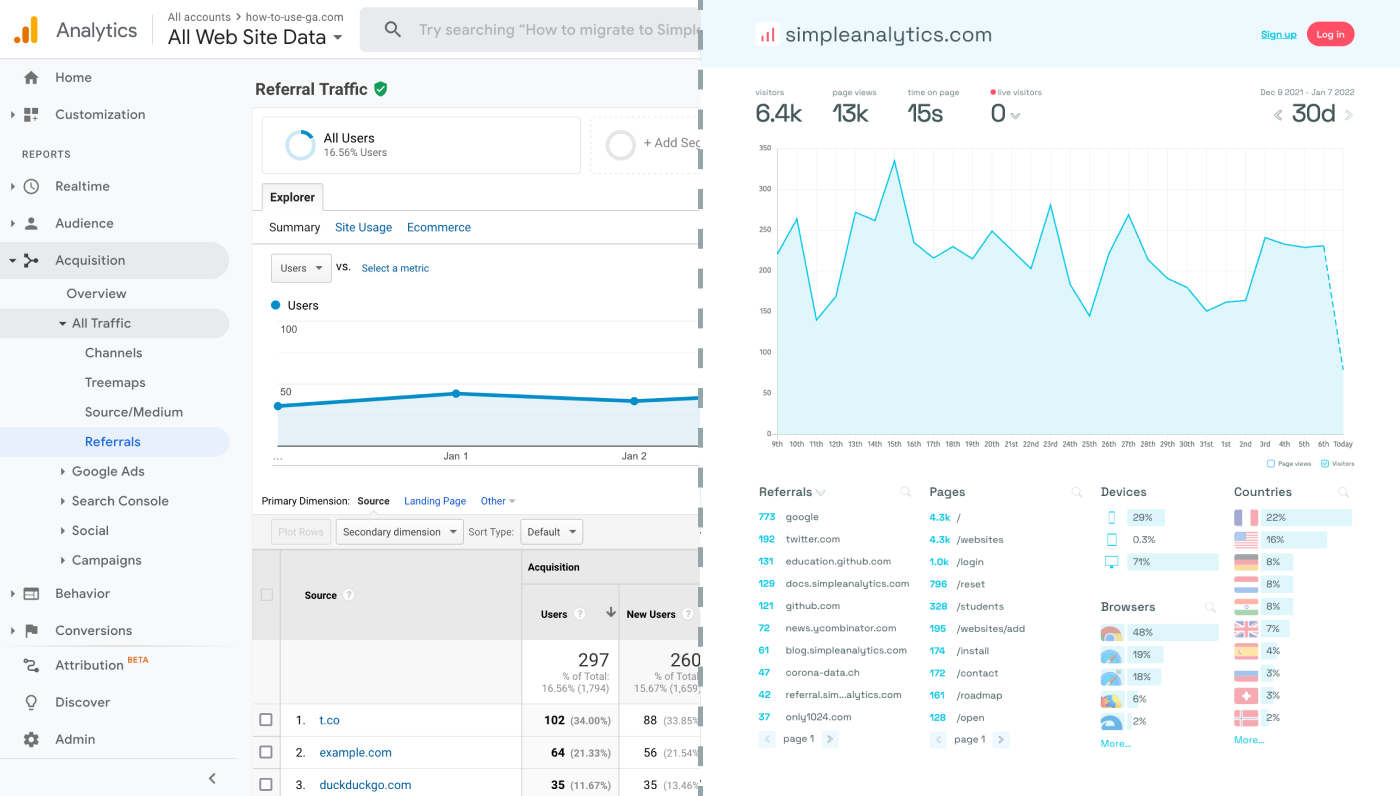
Before we dig in you need to know that Google Analytics is complex and a bit clunky. There are other options that give you the same insights in a slick and straightforward dashboard.
Simple Analytics is one of them. A privacy-friendly and simple analytics tool - just the insights you need in a straightforward dashboard. (And its also free yes).
All right, now let's get into answering your question!
Set Up Google Analytics
If you haven't already set up a Google Analytics account for your website, you'll need to do that first. Here’s a quick setup guide:
- Create a Google Analytics Account: Visit the Google Analytics website and sign in with your Google account. If you don’t have one, you’ll need to create it.
- Set Up a New Property: Follow the instructions to create a new GA4 property, selecting "Web" as the platform type.
- Obtain Your Measurement ID: After setting up your property, Google will provide you with a Measurement ID (formatted as "G-XXXXXXXXXX"). Note this ID down, as it's crucial for integrating GA with your SharePoint site.
Add Google Analytics to Your SharePoint Site
Integrating Google Analytics into SharePoint requires adding the GA tracking code to your site pages. This process may vary slightly depending on whether you're using SharePoint Online or an on-premises version. Here's a general approach for SharePoint Online:
- Access Your SharePoint Site: Log in to your SharePoint site with an account that has editing permissions.
- Edit the Master Page (Optional): For a site-wide implementation, consider editing the master page to include the GA tracking code. This step requires SharePoint Designer or access to the SharePoint admin center. Navigate to the master page (e.g.,
seattle.master) and insert the GA tracking code inside the<head>tag.- Note: Editing the master page is recommended for experienced users or administrators. For a less intrusive option, proceed to the next step.
- Use a Script Editor Web Part: For specific pages or without editing the master page, you can add the GA tracking code using a Script Editor Web Part:
- Edit the page where you want to add GA tracking.
- Add a Script Editor Web Part to the page.
- Edit the newly added web part and paste the Google Analytics tracking code into it.
- Save and publish your changes.
- (Optional) Create New Properties: if you want to add Google Analytics to multiple Sharepoint sites, we strongly suggest that you set up a different GA property for each website and use the corresponding code and Measurement ID. This allows GA to monitor each website individually.
Verify the Integration
To ensure Google Analytics is correctly tracking your SharePoint site:
- Check Realtime Reports in GA: After adding the tracking code and accessing your SharePoint site, open your Google Analytics account and navigate to the "Realtime" report to see if your activity is being tracked.
- Troubleshoot If Necessary: If you don't see any data in Realtime reports, double-check the tracking code placement and ensure the page with the tracking code has been accessed.
Final Thoughts
Adding Google Analytics to your website can give you great insights. However, ask yourself: is Google Analytics the right tool for you?
GA is an overpowered solution for straightforward analytics. If you're looking for a simple and intuitive dashboard with the insights you need, there are better alternatives.
If this resonates with you, feel free to give Simple Analytics a spin. You just need to add the script to your app and off you go. This takes about one minute- and there is a free version as well!
Enjoy!