
This guide will outline the steps to install Simple Analytics on your website, including advanced settings like custom domains and DNS settings.
It requires some technical knowledge, but we’ll explain it in steps. If you use a website platform, such as Squarespace, Webflow, Wix or Google Tag Manager, etc. We have created different guides for those.
In this guide we'll focus on the standard method suitable for most websites.
Adding your website
The first step is to go to your website's overview. We display five websites here, but yours is probably empty.

Click "Add website" and enter the domain name or website name. For the sake of this example, we will add demo.simpleanalytics.com.
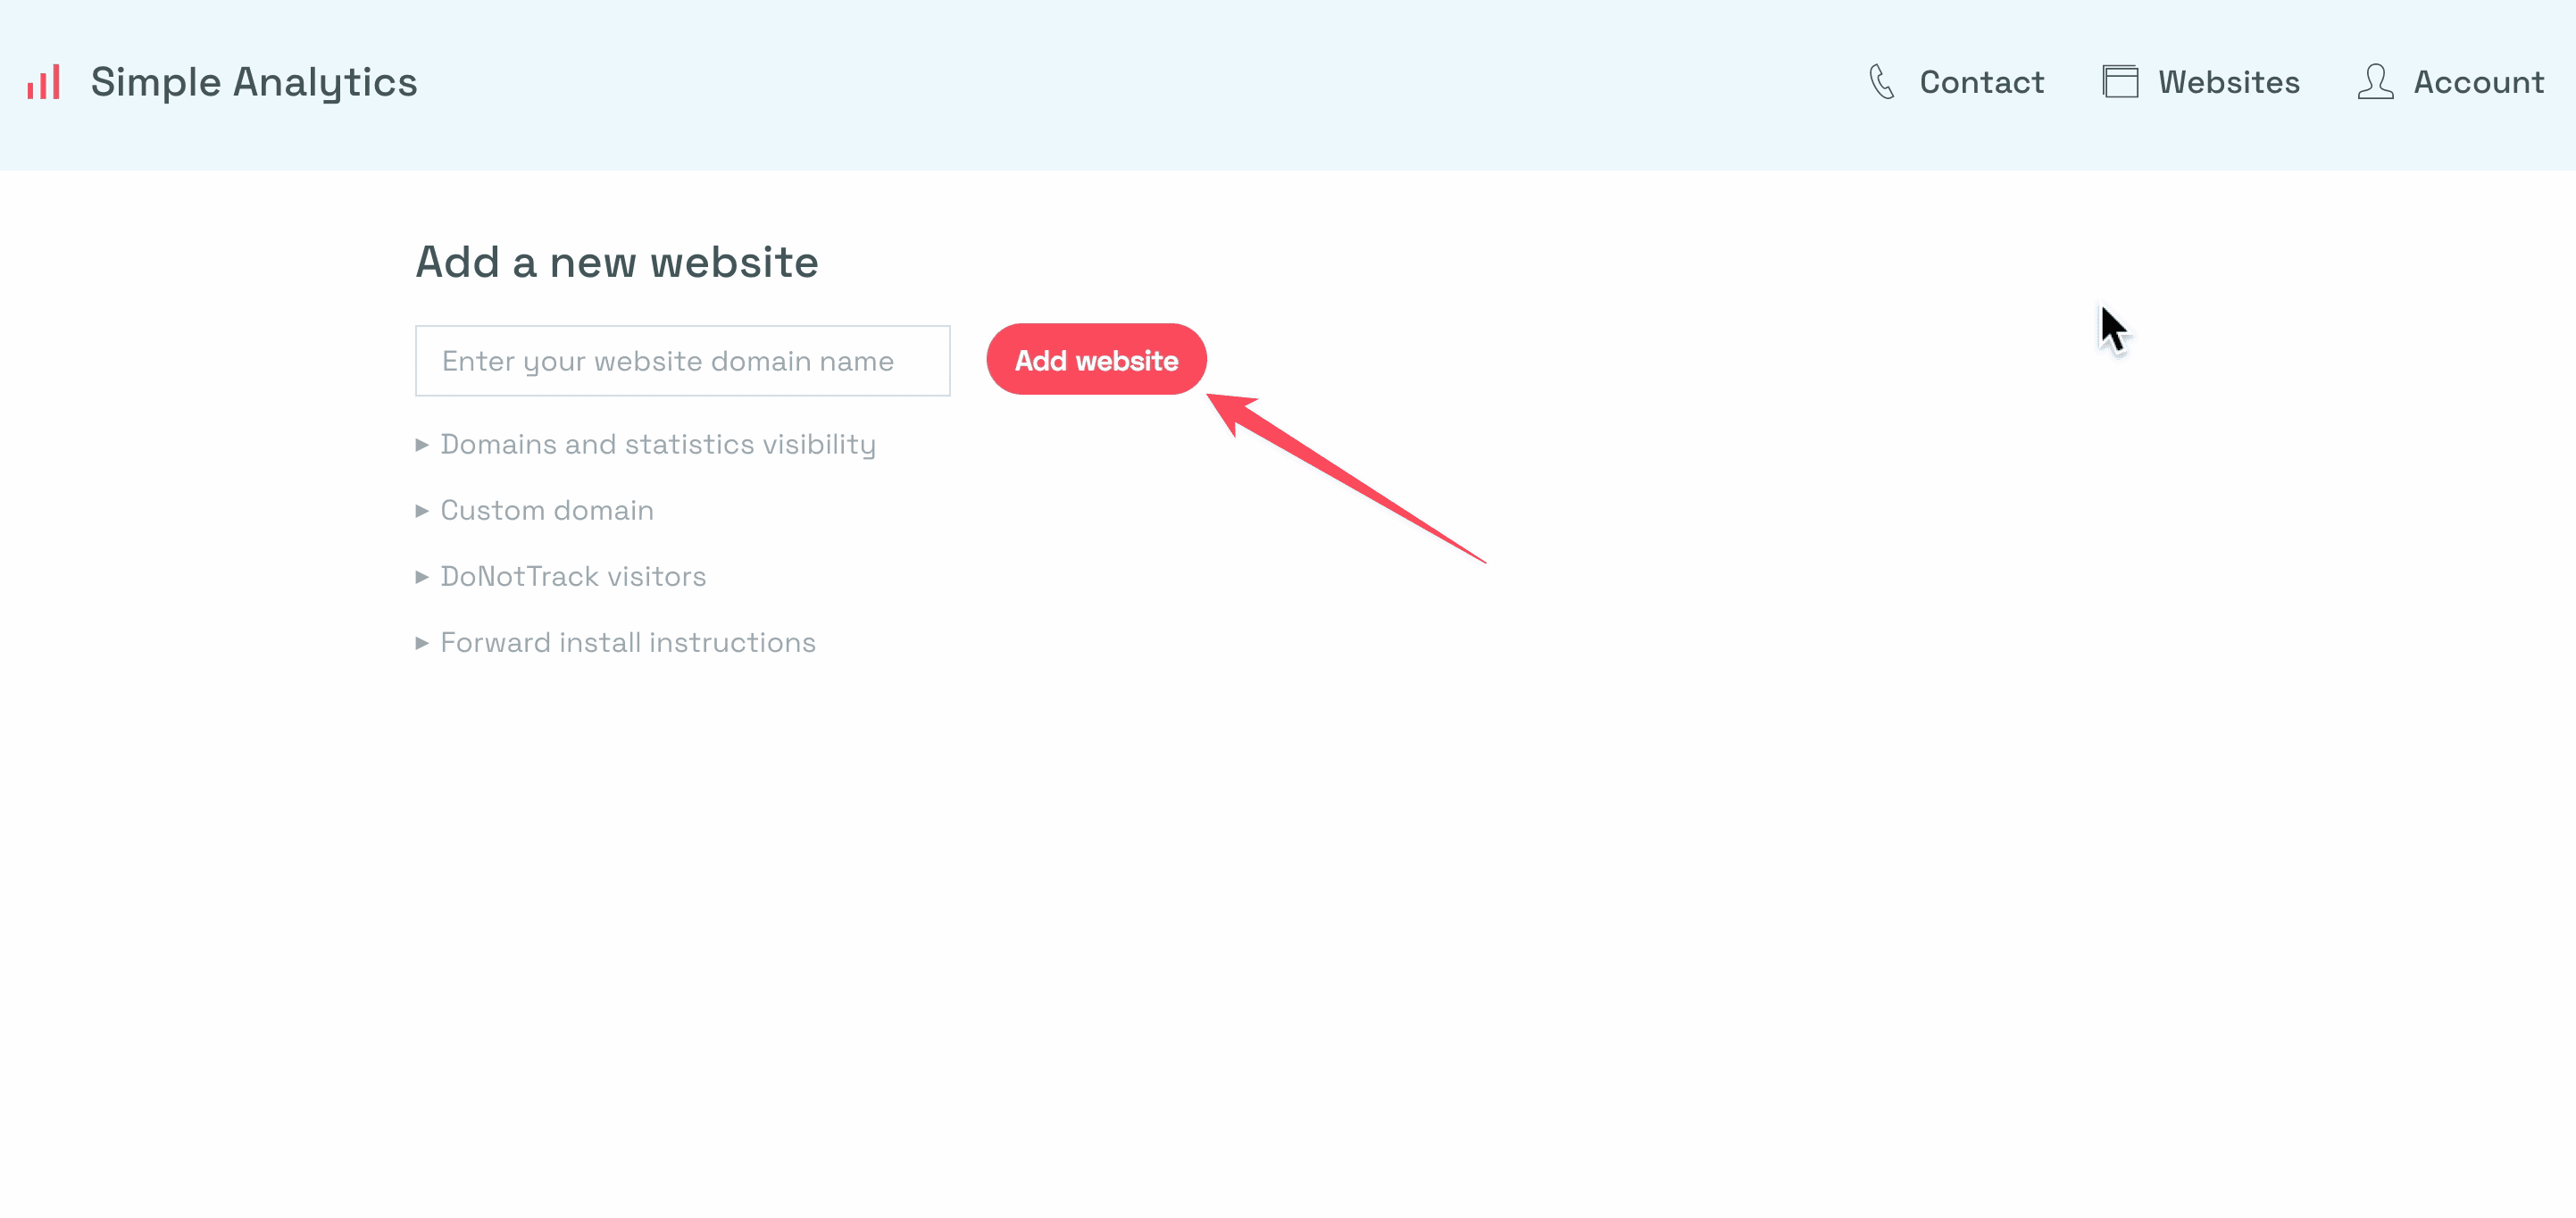
You can remove "https" or "www" and enter the root domain. If you have both subdomains and root domains, you can add those separately. Simple Analytics treats subdomains the same as a standalone website.
Advanced settings
Simple Analytics offers several advanced settings you can tweak based on your needs.
Domains & Statistics
Here, you can specify the subdomain you want to track. Each subdomain is treated as a separate website. Although you don't pay extra for each additional website, there is a limit on the number of websites you can add to your plan.
In the example, we added the subdomain demo.simple.analytics.com.
Public Website
When you want to make your website visitor insights public, you just tick the box. There is also an option to hide certain pages from the public.
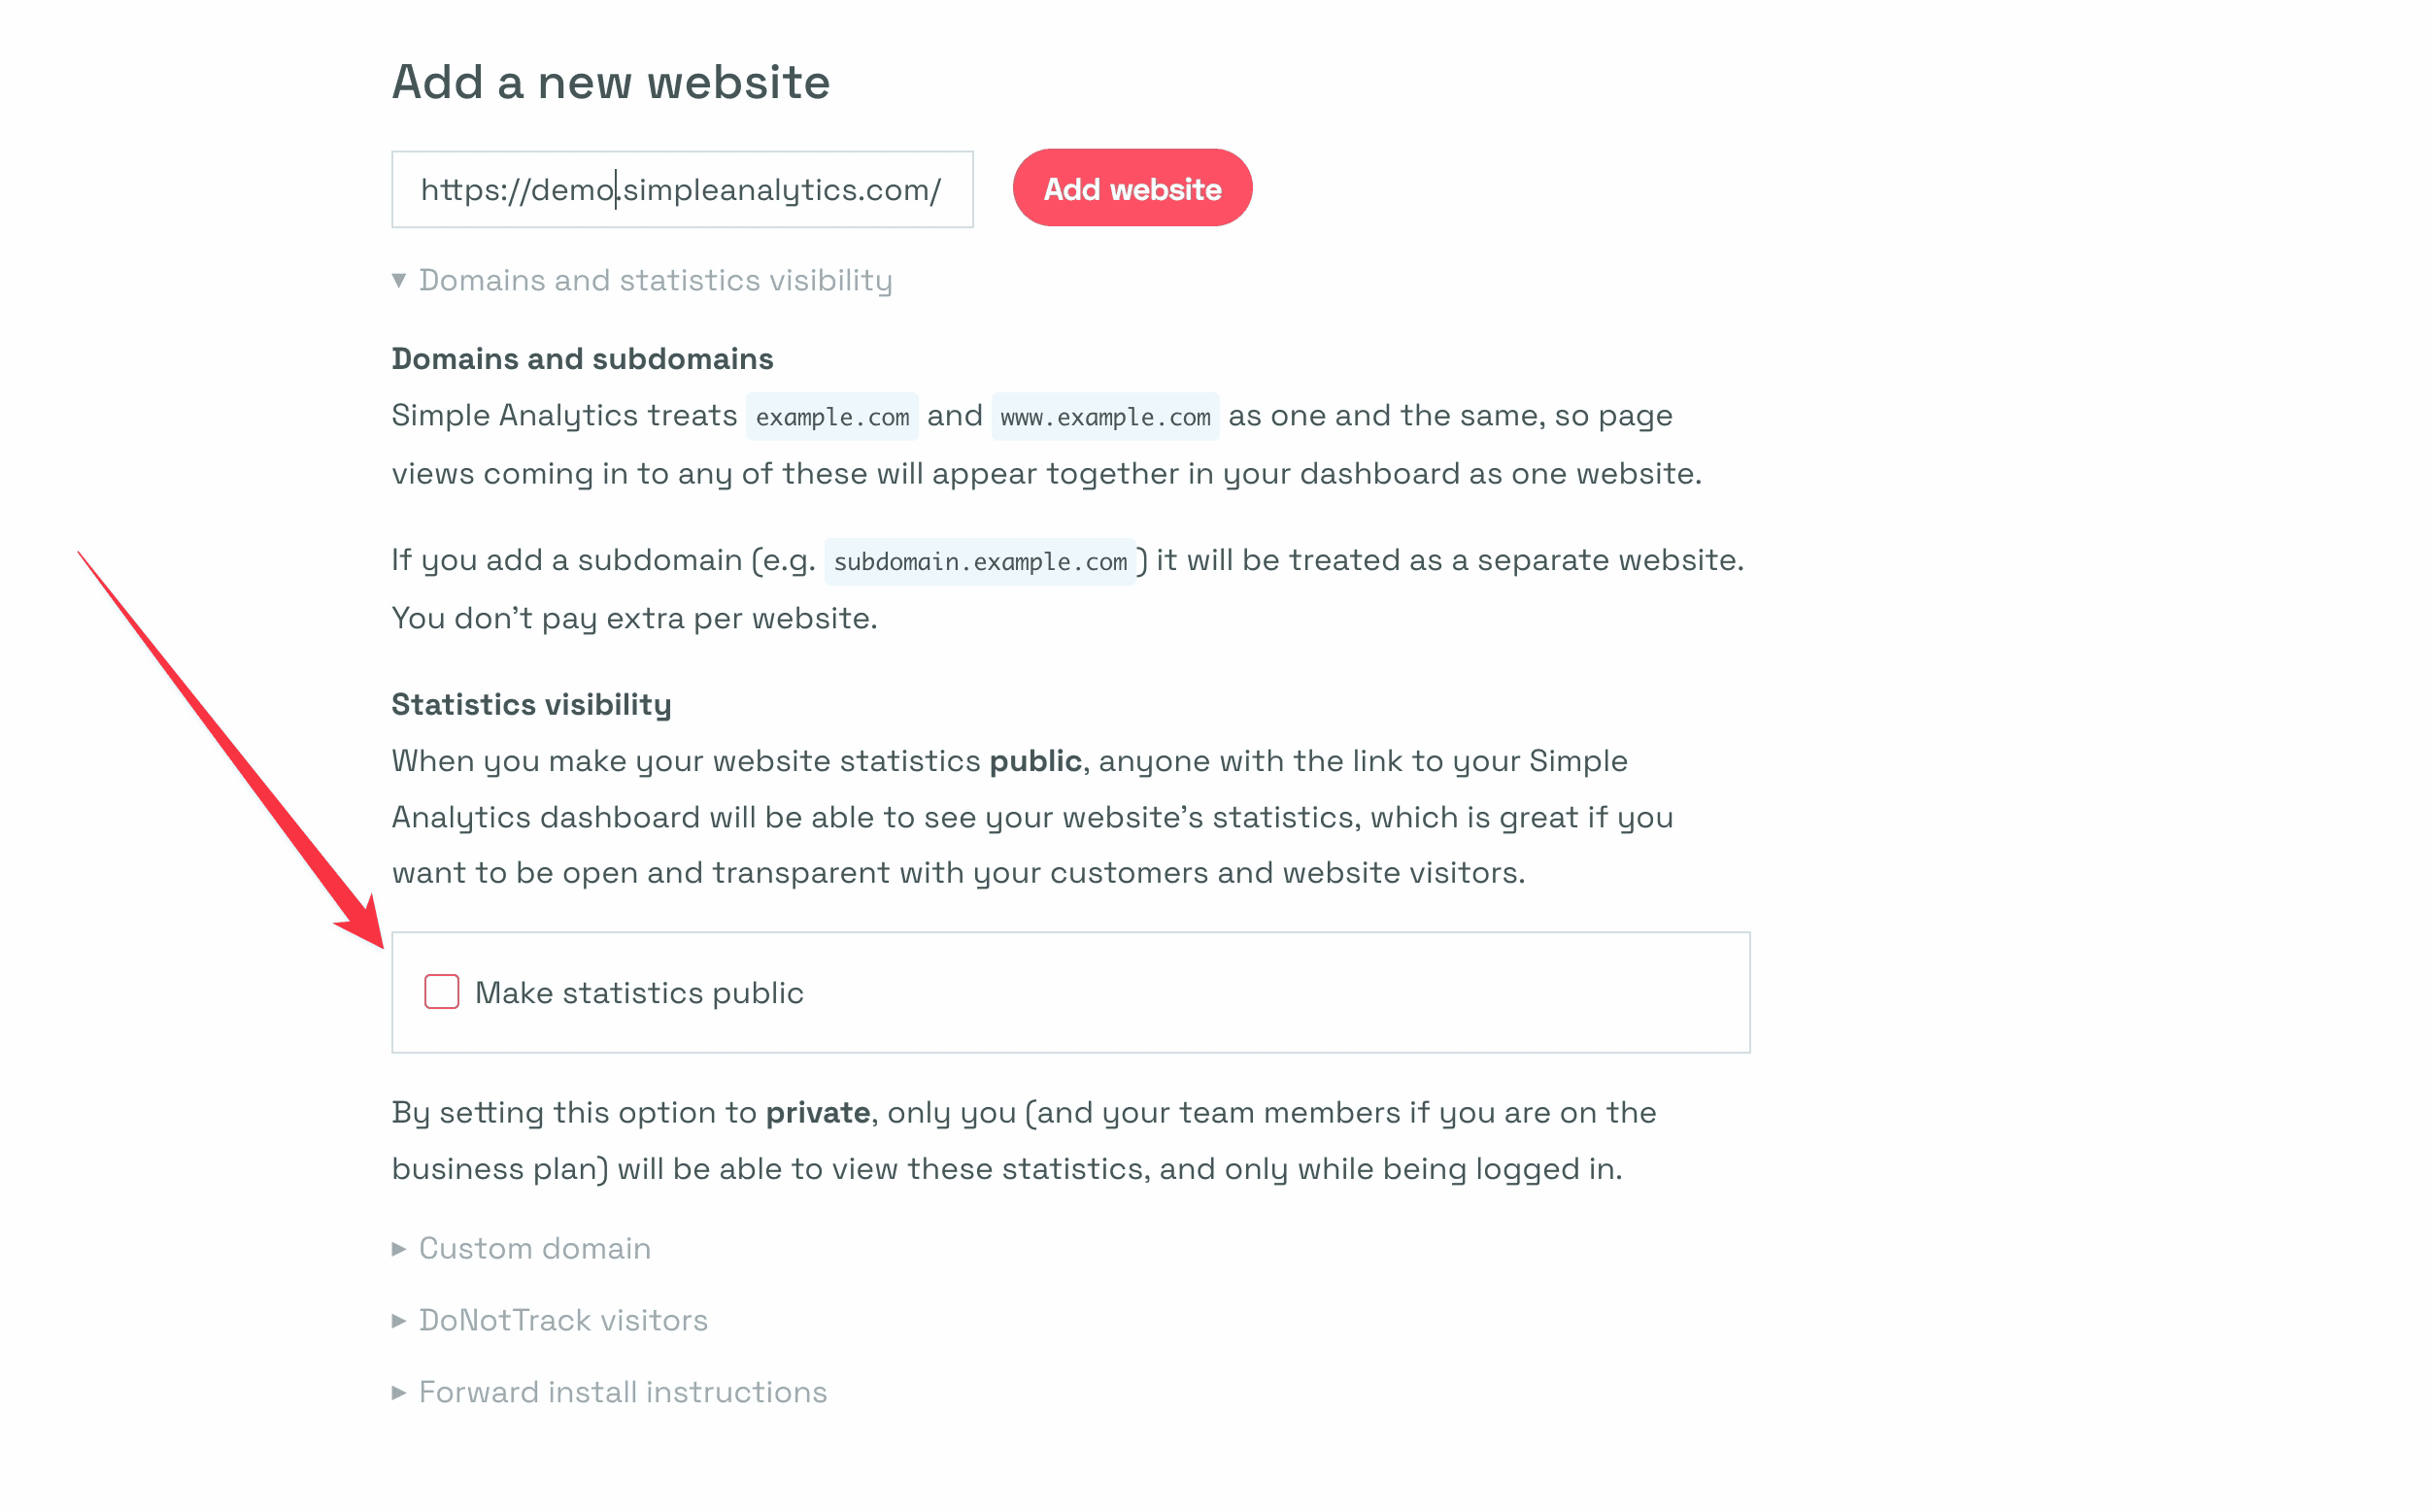
For example, our website insights are made public, so when you visit simpleanalytics.com/simpleanalytics.com, you will see our website stats.
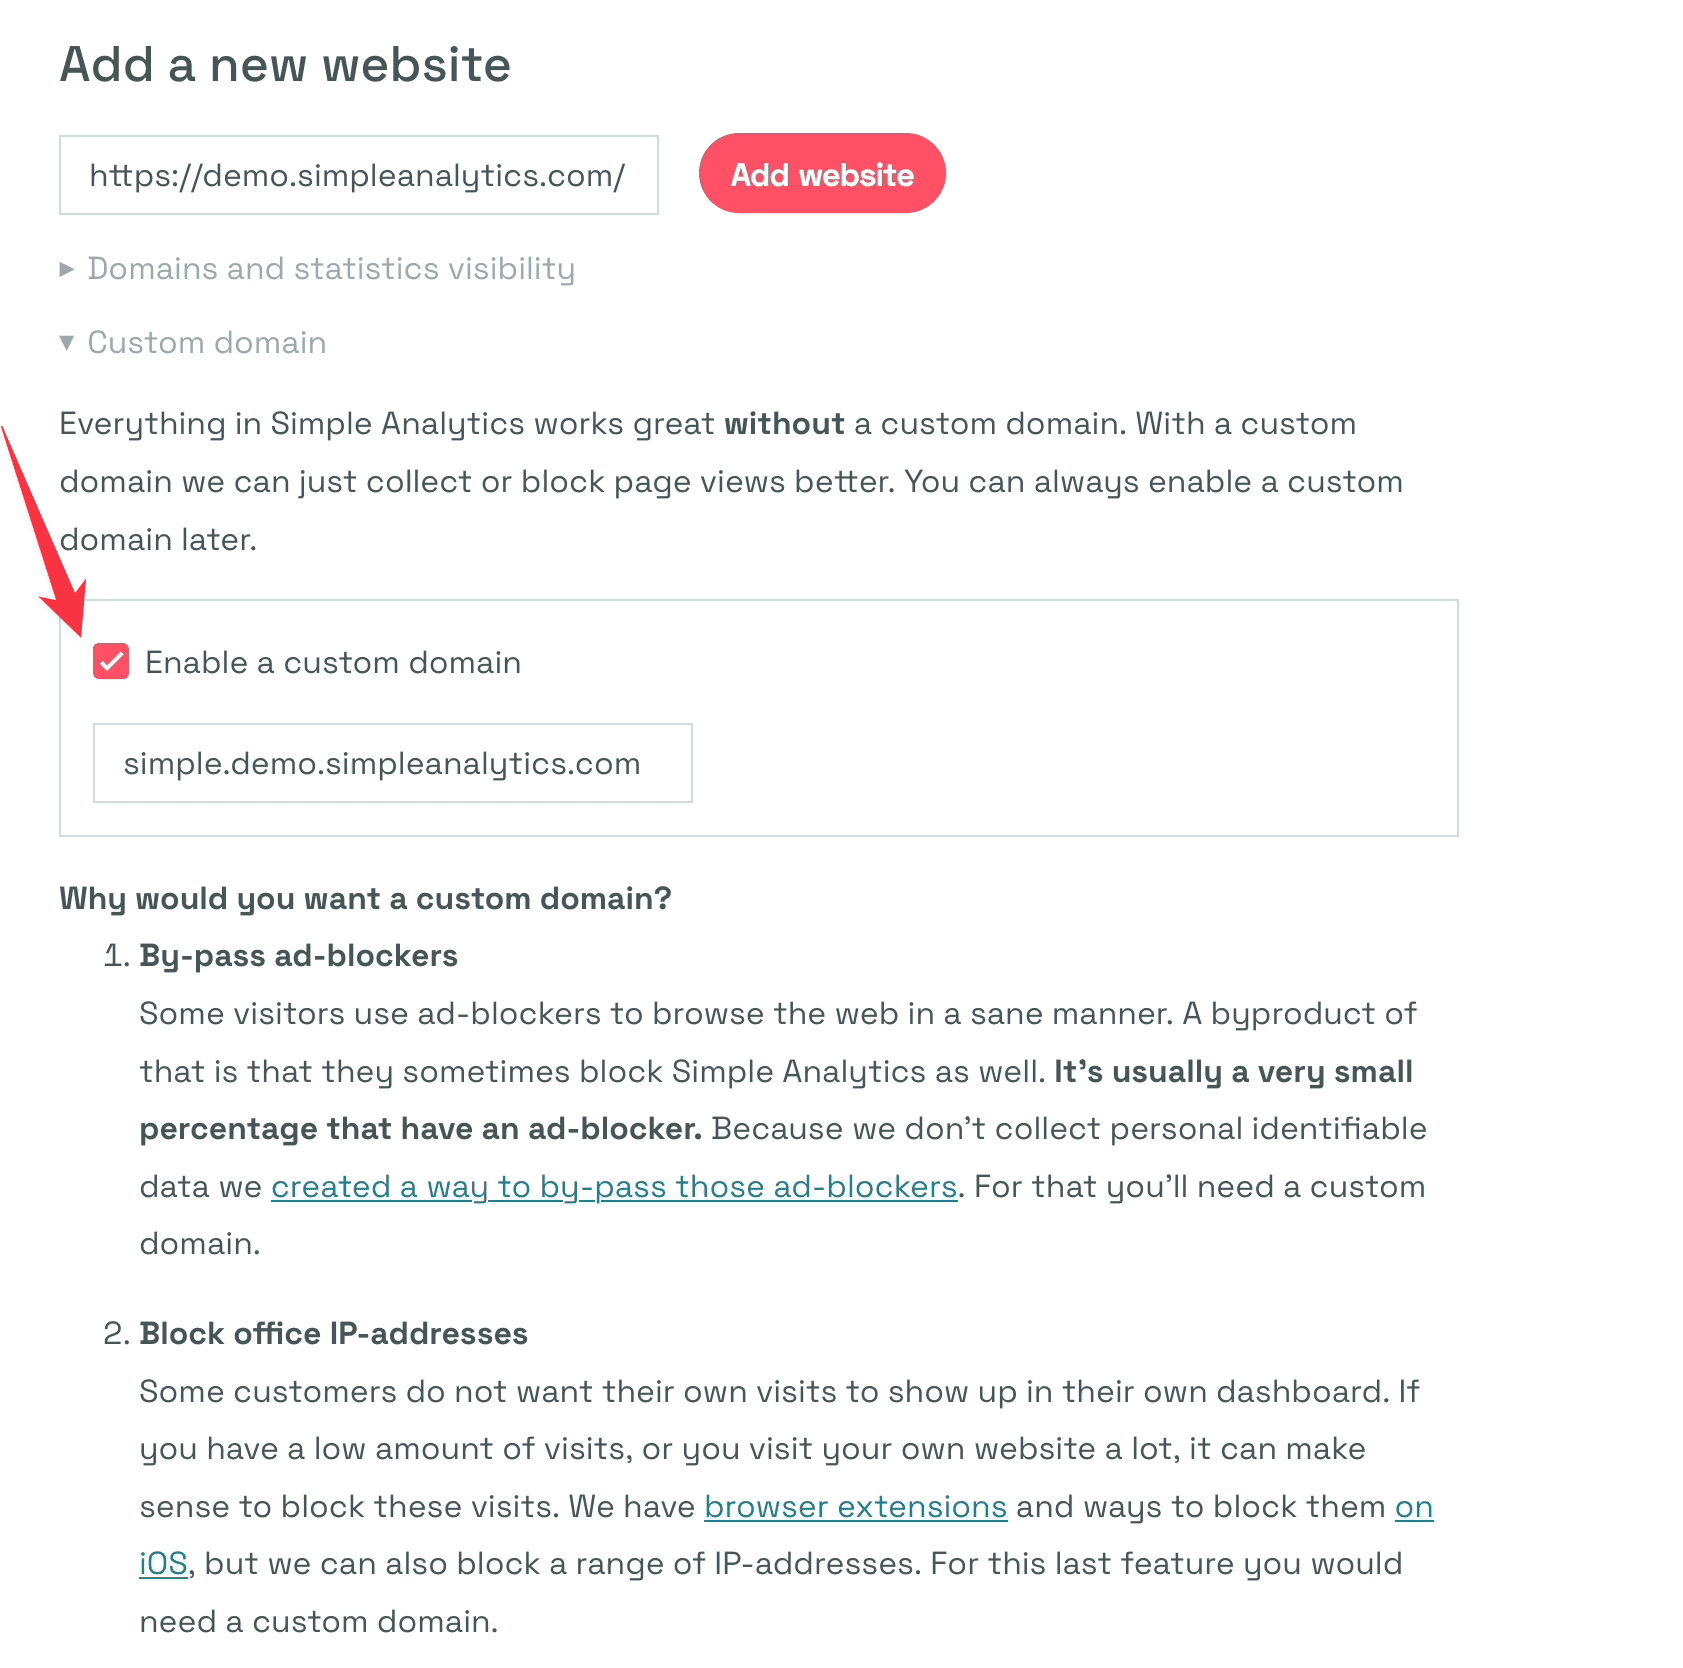
Custom Domain
Another option available is a custom domain, essentially an extra subdomain. If your website is example.com, you can add stats.dot.example.com, which redirects to your statistics. The primary reason to use a custom domain is to bypass ad blockers.
There is also an option to block your office IP addresses, which allows you to prevent certain IP addresses or a range from being counted towards your statistics. By doing this, your visits will not be included in the dashboard, making tracking traffic more accurate.
The bypass blocker option is helpful, but its significance is lower than one may think. Although a considerable amount of people use ad blockers, it usually ranges between 2% to 10%, depending on the audience. The percentage for e-commerce websites is likely lower as most users don't use ad blockers. However, if you want to ensure that you can bypass them anyway, you can activate the custom domain option by clicking on it.
In the example below, we used simple.demo.simpleanalytics.com. But it can be literally anything.
DNT
One option to consider is not tracking visitors, which some browsers allow users to request. However, this feature is no longer supported in many browsers and is gradually fading away. Despite this, Simple Analytics has always respected this feature and has not tracked visitors who opt out.
However, users can still collect information from visitors who opt out of tracking, as Simple Analytics does not collect personal data from its visitors. The script will be adjusted accordingly if users click the "do not track visits" option.
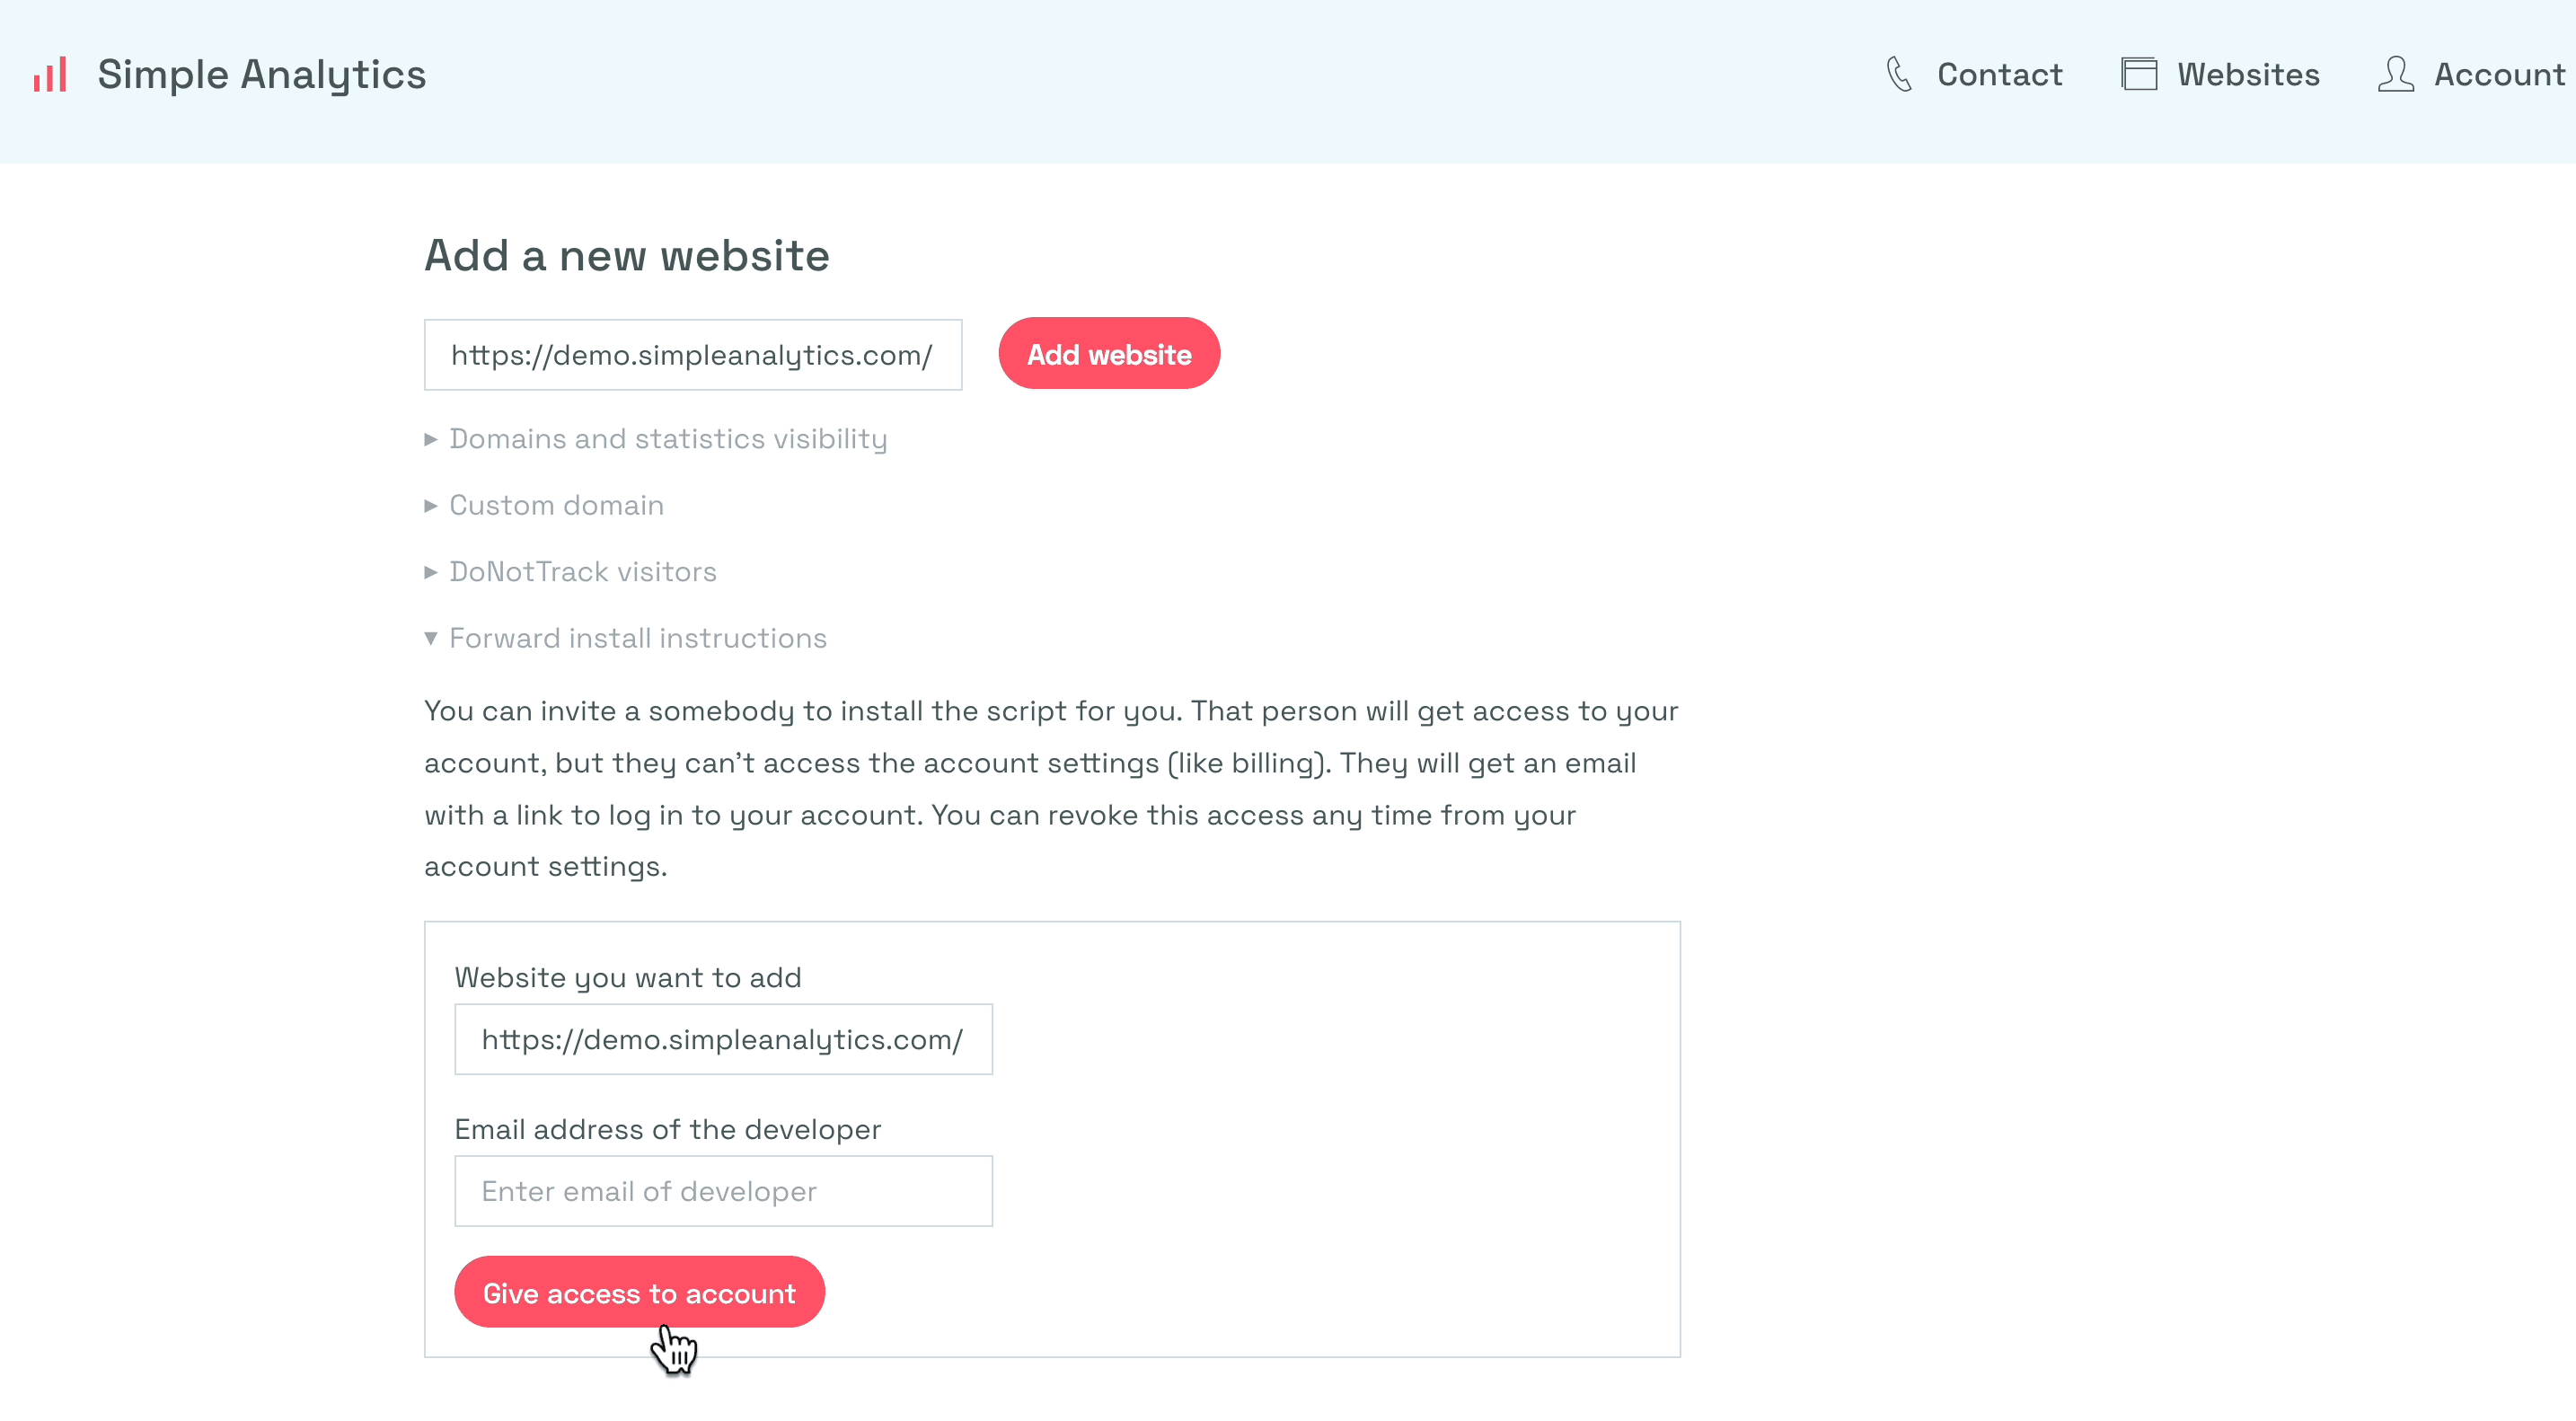
Get help from your team
If you feel uncomfortable installing the script on your website, you can invite others to do it for you. By entering their email address, you can grant them access to your account so that they can add the website and update the script on your behalf.
This is a useful feature for those who may not have the technical expertise or prefer to delegate these tasks to other team members.
Adding the script
Once you have completed the advanced settings, install the Simple Analytics script on your website. Simple Analytics detects the technologies used by your website and provides an HTML code that you can copy and paste into your website.
You can also choose from other install options that cover most of the platforms and frameworks out there.

We will scan your website to see what website technologies you use. This might take some time. Once the tool has completed its scan, you will see a few options for installing the script on your website.
In this case, it detects two technologies. One option always is to select HTML, the basic language used to create websites. You can also click the "show all" option to see all the available installation options for most platforms and frameworks. You can always let us know if you need additional options, and we will add them.
If you encounter any issues with the installation, you can reach out to Simple Analytics for support. Community support is available for the free plan users, while paid plan users can email Simple Analytics directly for assistance.
Let's see what HTML looks like.
Include these two lines at the end of your <body> (or anywhere else):
<script async defer src="https://scripts.simpleanalyticscdn.com/latest.js"></script>
<noscript><img src="https://queue.simpleanalyticscdn.com/noscript.gif" alt="" referrerpolicy="no-referrer-when-downgrade" /></noscript>
To add the Simple Analytics script to your website, you must add a few lines of code to your HTML. The exact location of where to add this code can vary depending on your website, but generally, it goes in the body section just before the closing body tag.
You can copy and paste the code for every website. For example, we installed the Simple Analytics script on the demo website using GitHub.
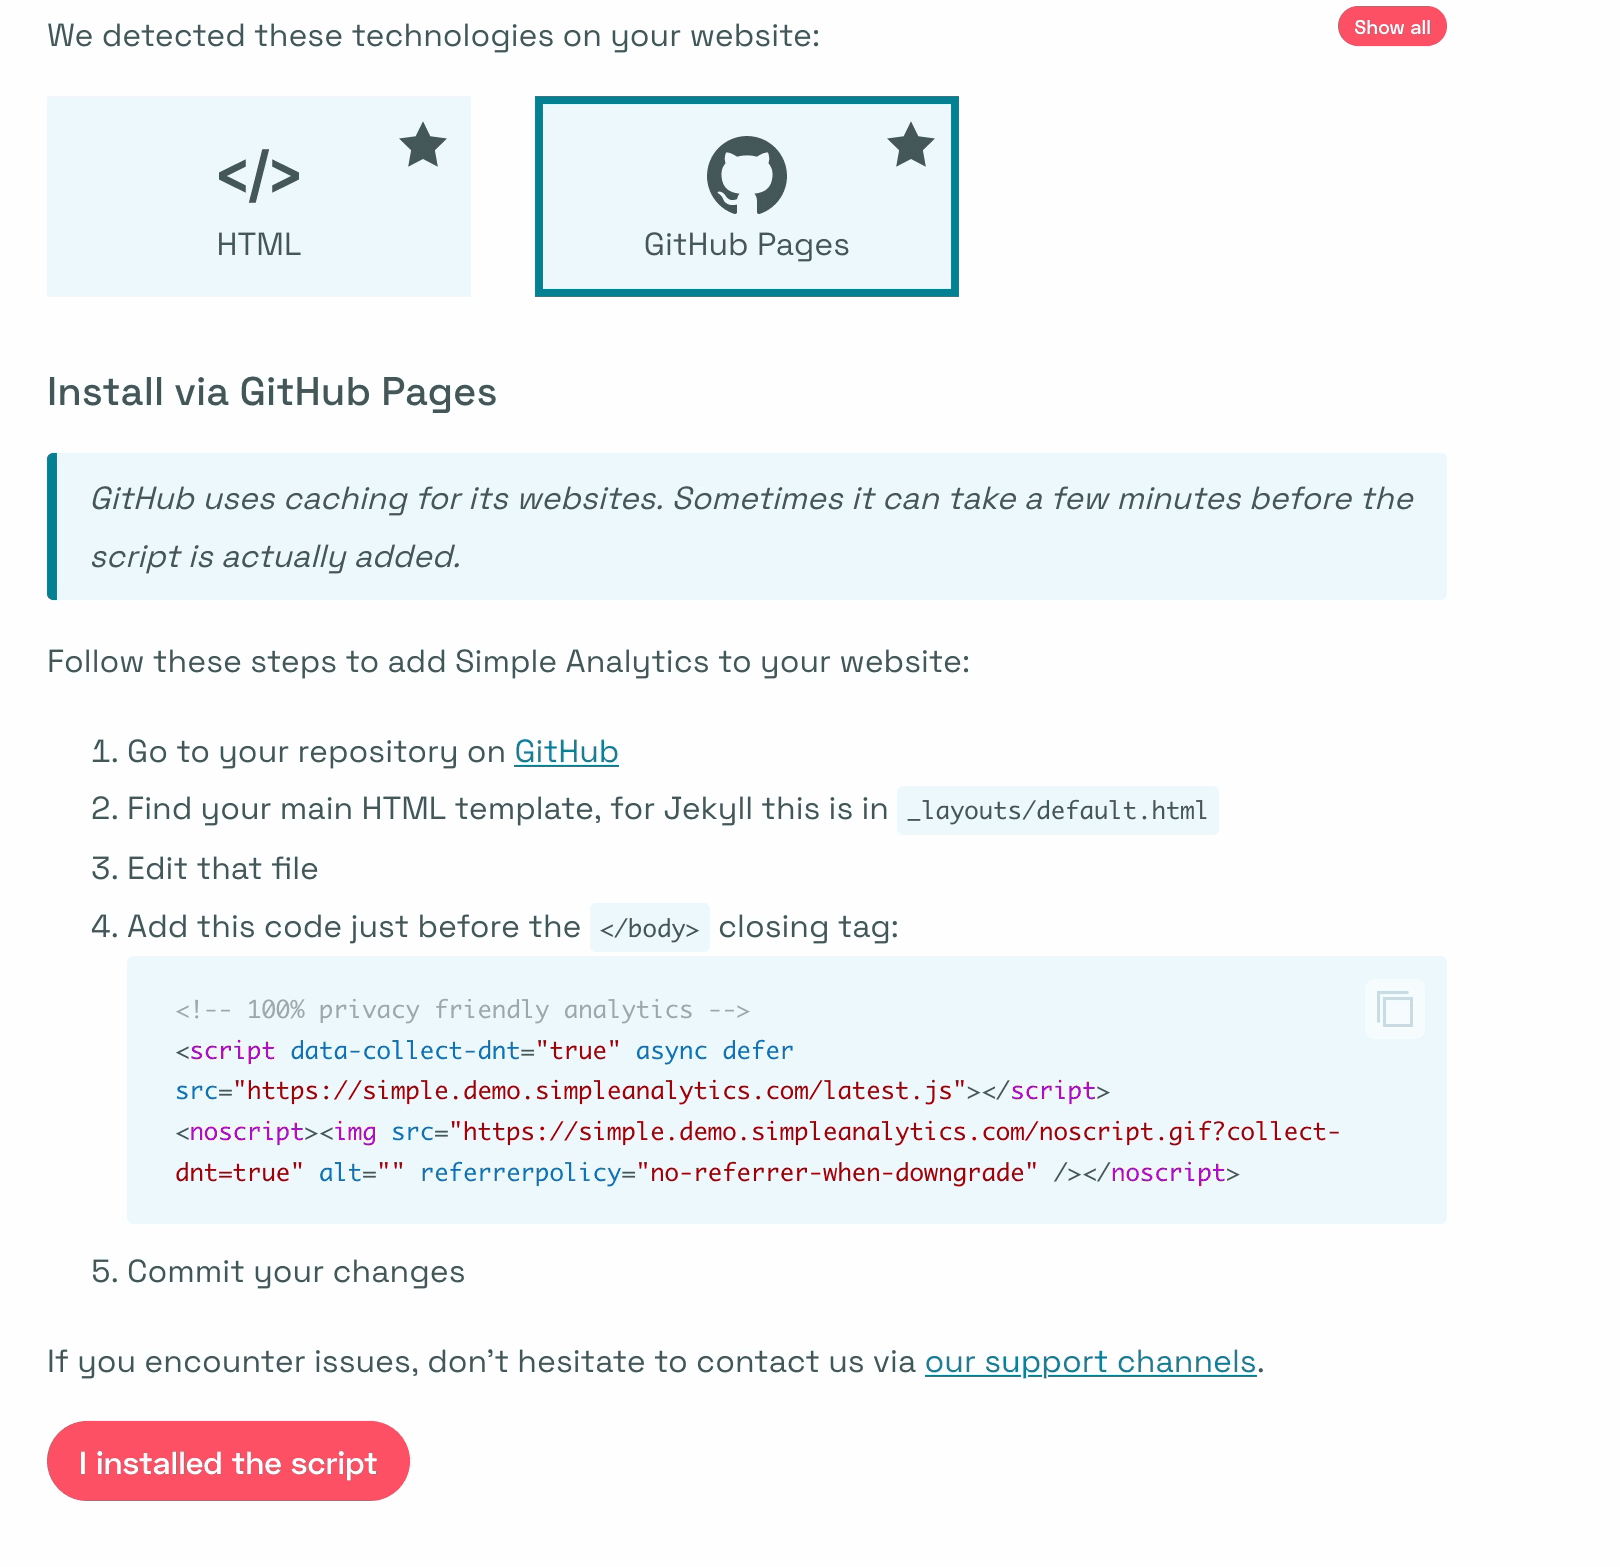
Follow the steps, copy/paste the script and save it.
If you look at the code you just copied, you can see the parts that indicate we are installing a custom domain. Also, we have enabled the Do Not Track feature in our settings, meaning it also collects those visits.
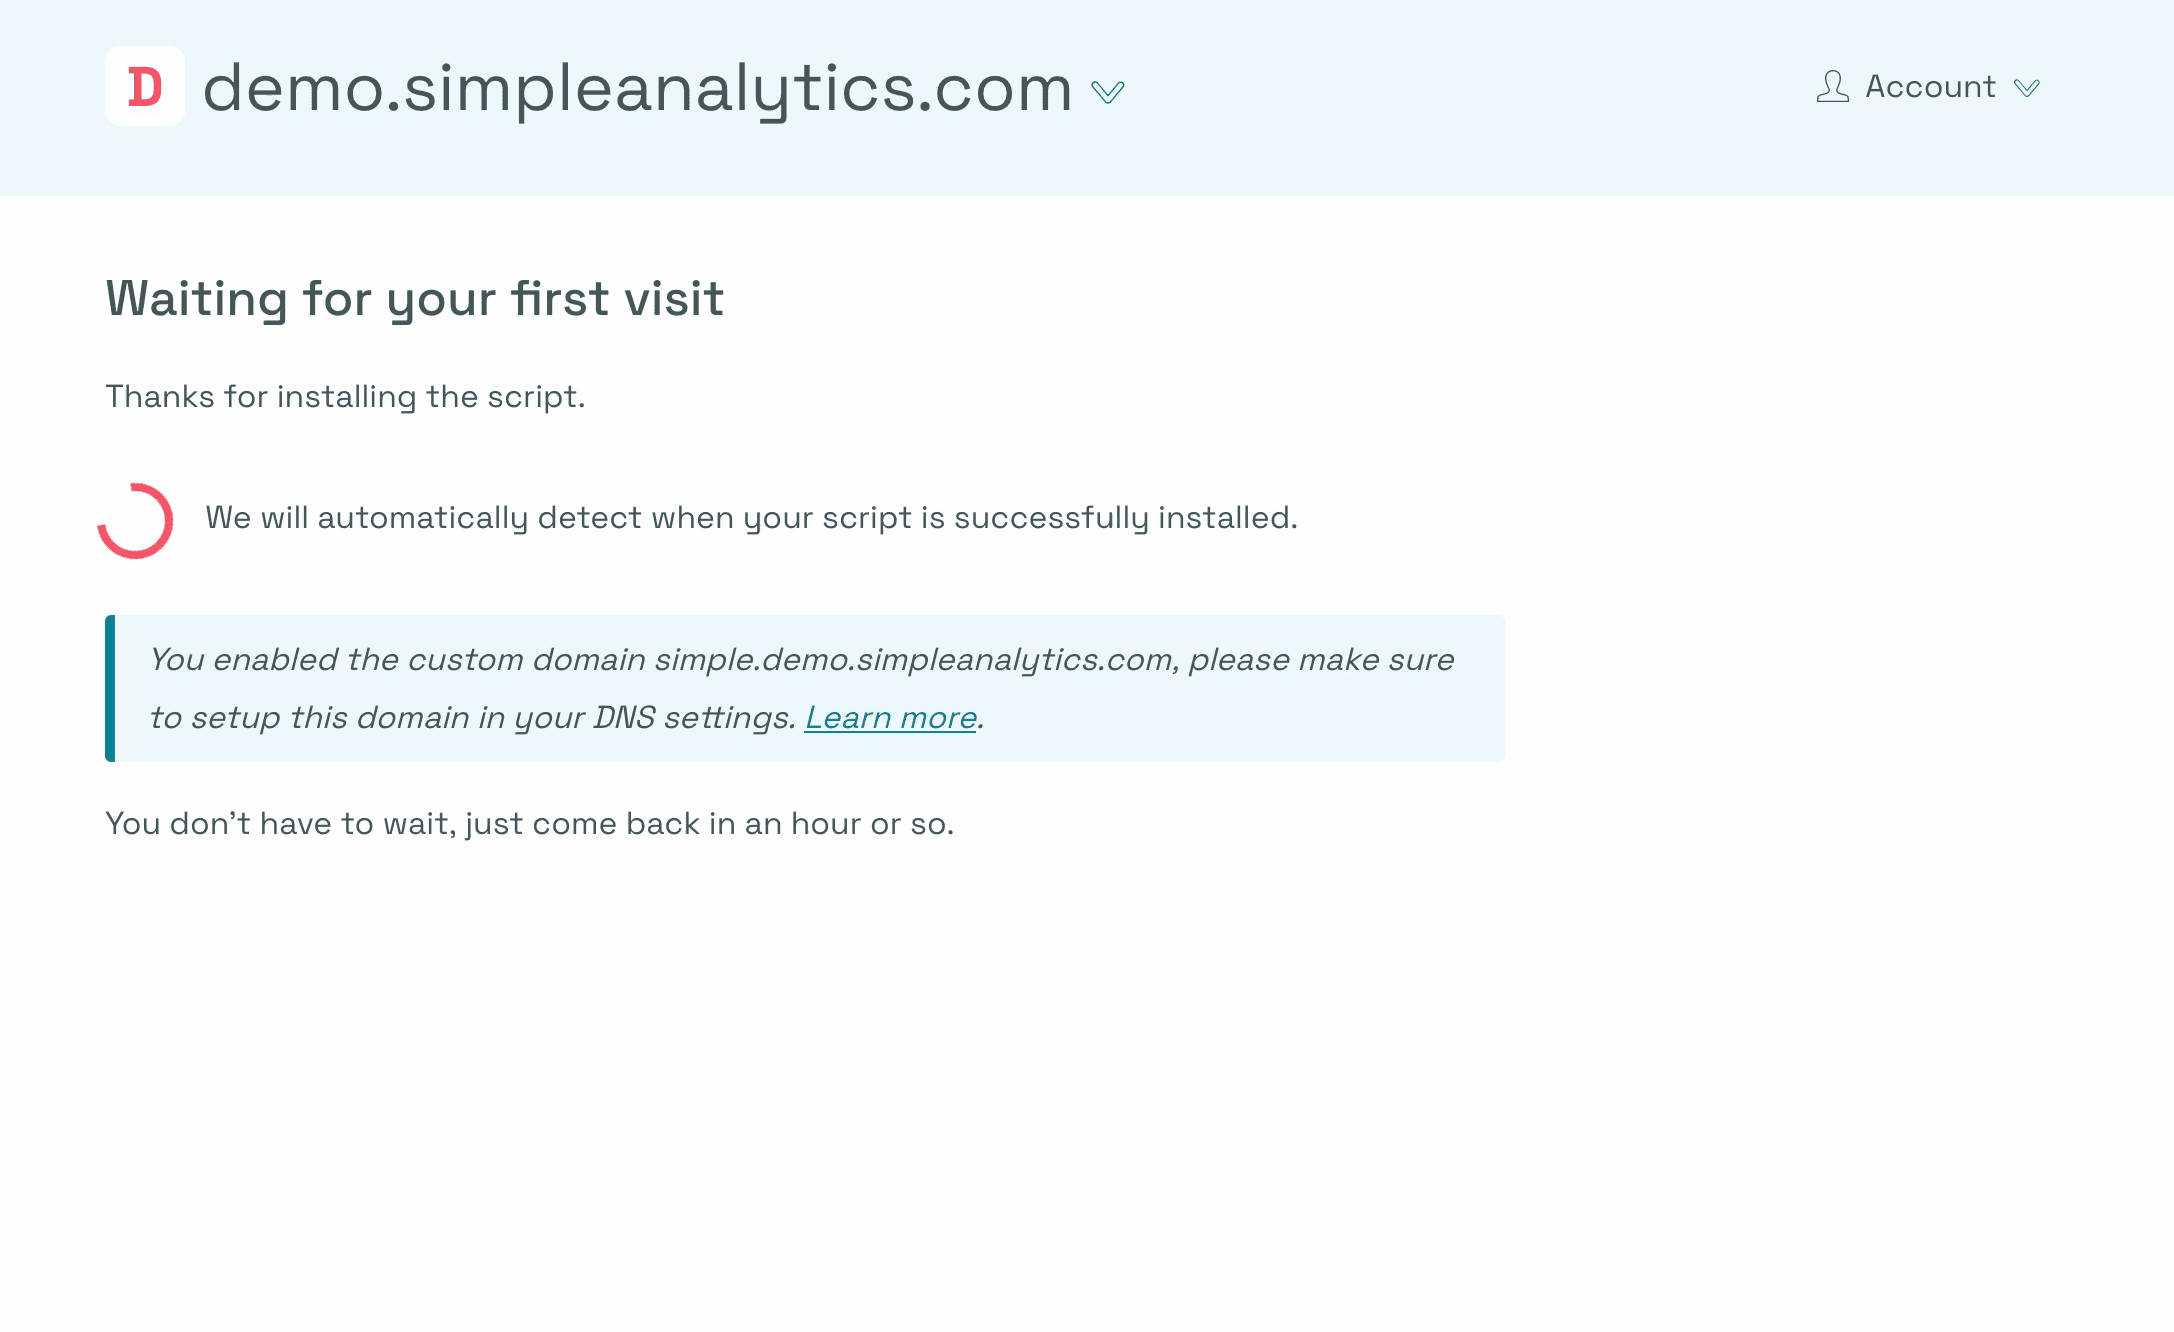
The code does not work right away. You must first click “install the script” on the installation page.
(If you have a custom domain installed, scroll down to follow additional instructions)
After you click the button, it goes automatically, and we are almost ready! You must now wait for your first visit.
You can visit your website yourself if you don’t see a recorded visit yet.
Also, you can check if your website is properly sending data to Simple Analytics by visiting your website and inspect it.
By opening the network tab and refreshing the page, you can see that the request is being sent to Simple Analytics. However, it's important to note that sometimes it may take a few minutes for a visit to be recorded, or the SSL certificate needs to be propagated, so the first visit may not be recorded well.
We recommend waiting a few minutes before checking to ensure accurate data collection. If all is well, you should see something like this when returning to the installation page:
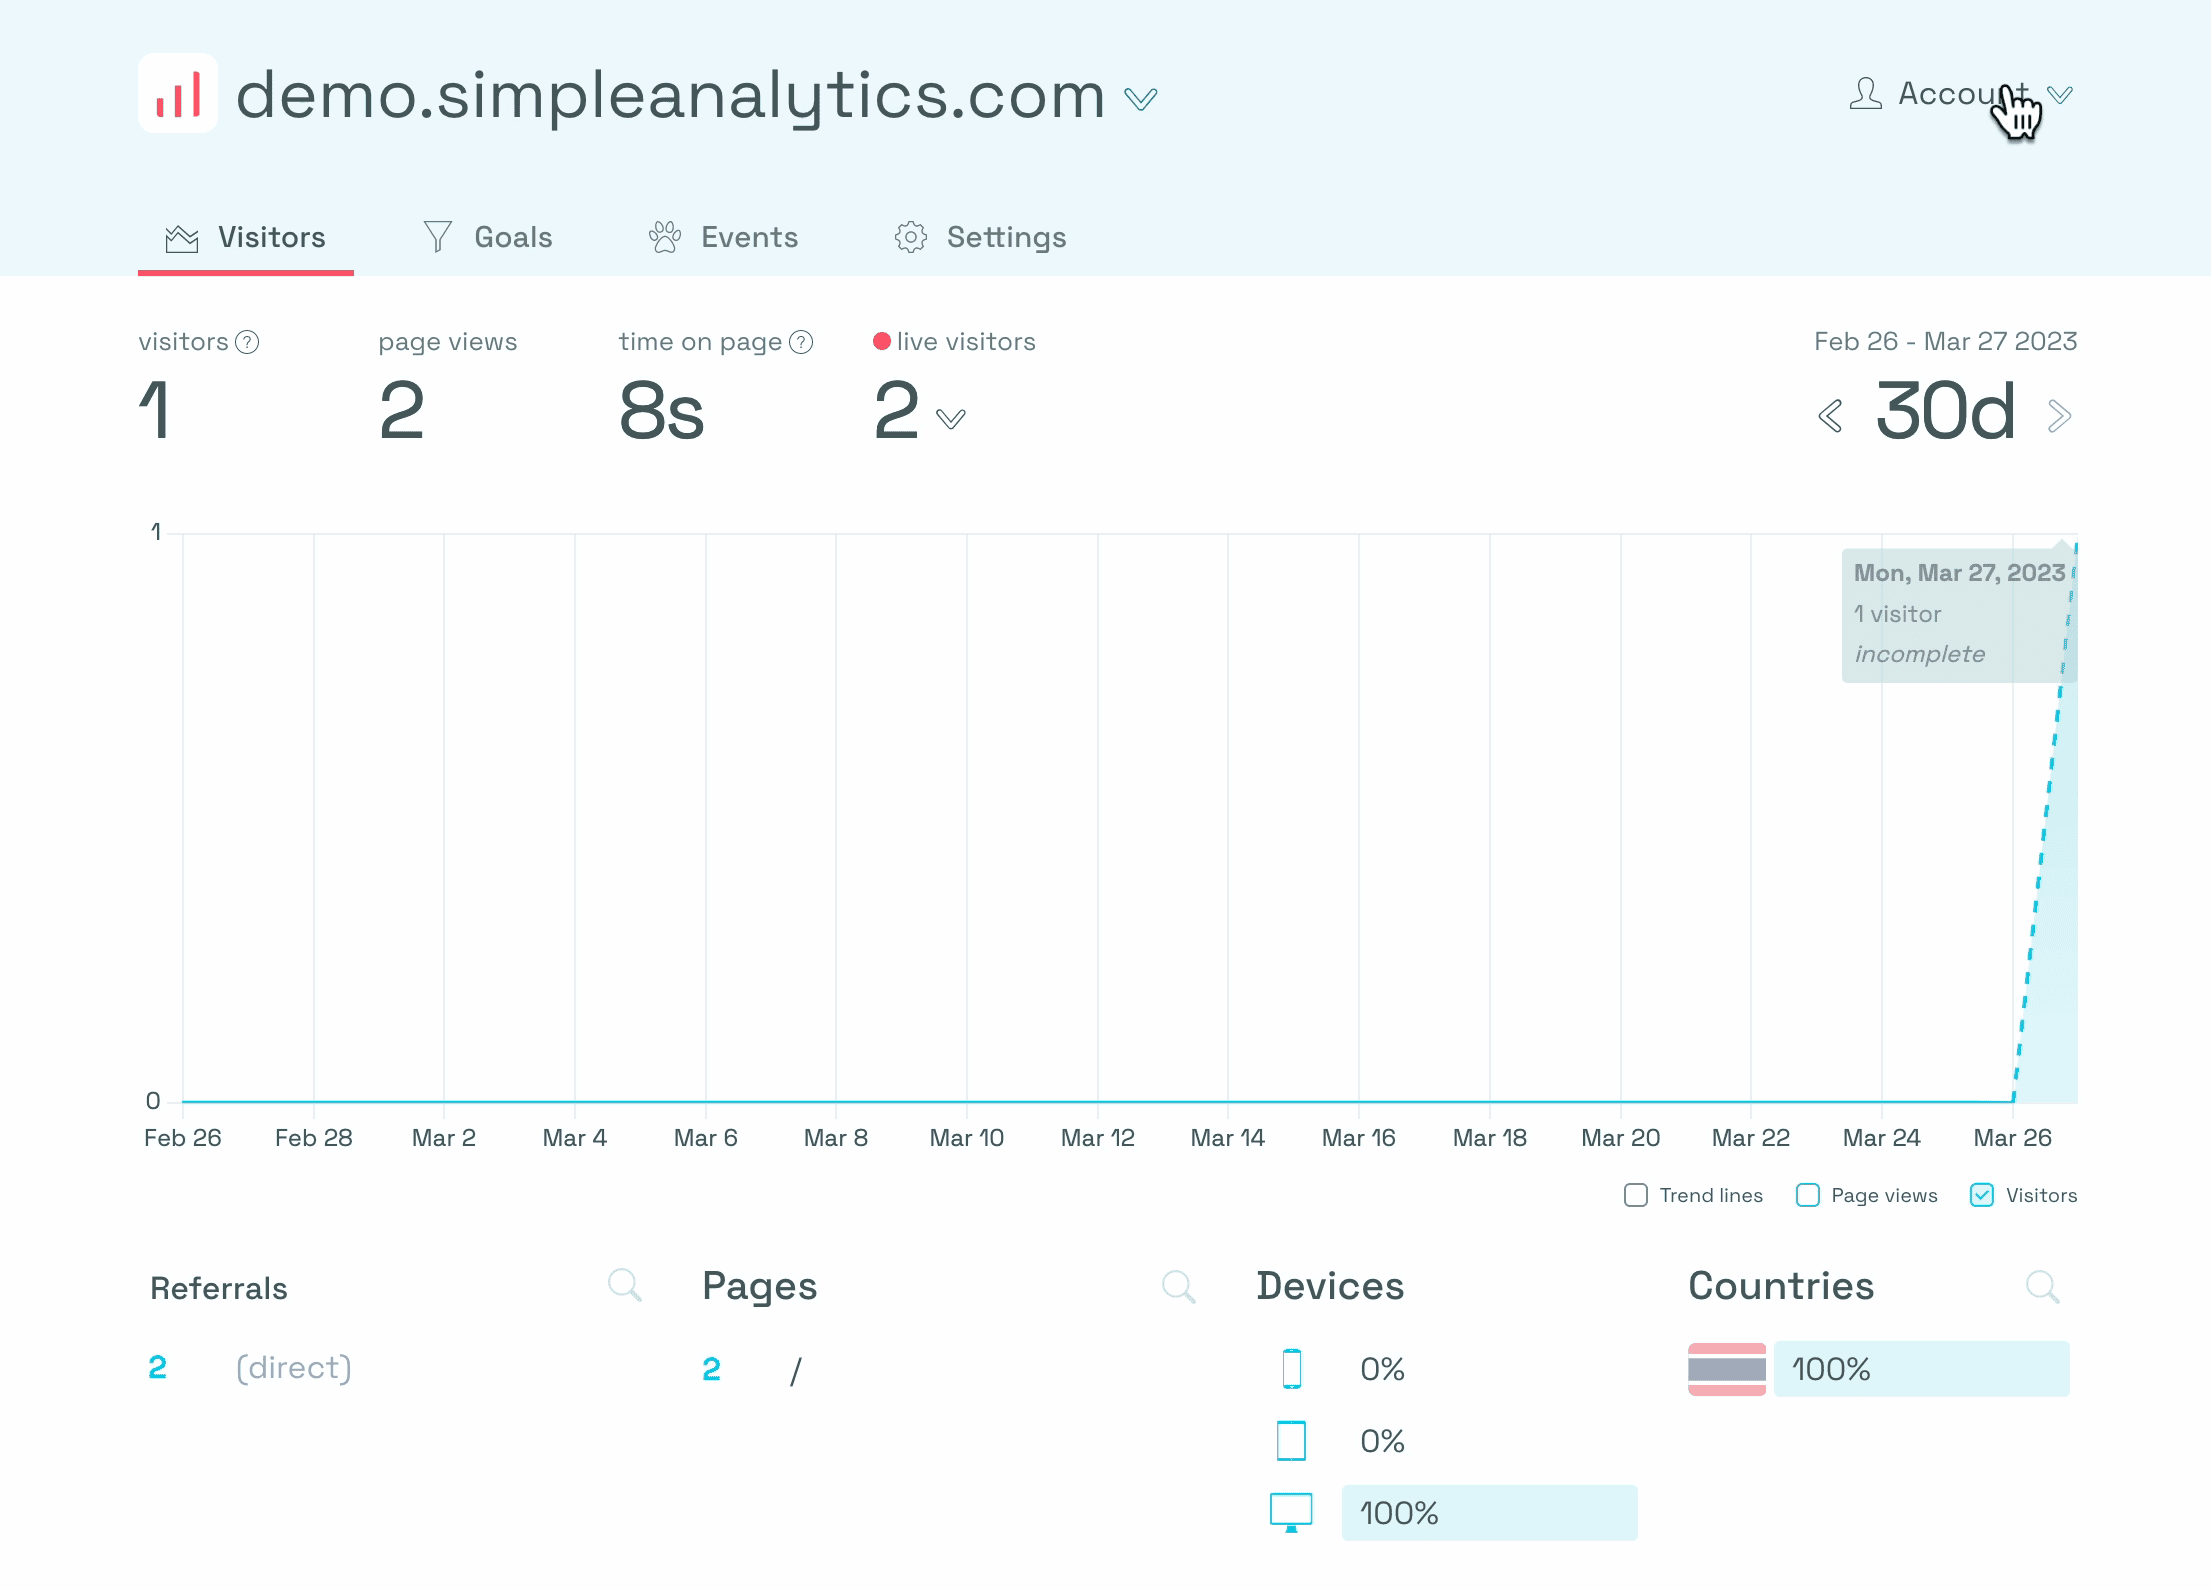
There you go!
Installing Simple Analytics on your website is easy if you follow these four steps carefully. There are many advanced settings that you can tweak to meet your specific needs.
DNS settings for Custom Domain
If you have set up a custom domain, you must configure your DNS settings. You will need to add a name to your DNS that links to the external server that Simple Analytics provides. Here are the steps:
To connect your subdomain to Simple Analytics, add a name to your DNS that matches your domain name. This subdomain must be linked to an external server hosted at simpleanalyticsexternal.com
Everything you need to know about adding a custom domain can be found on this page.
The process for adding this record to your DNS will vary depending on your DNS provider, but we will use Cloudflare as an example.
Once you're in your Cloudflare account, you can add the record to link your subdomain to the Simple Analytics external server. It's important to note that the form for adding this record will look different for every provider, but the general steps will be the same.
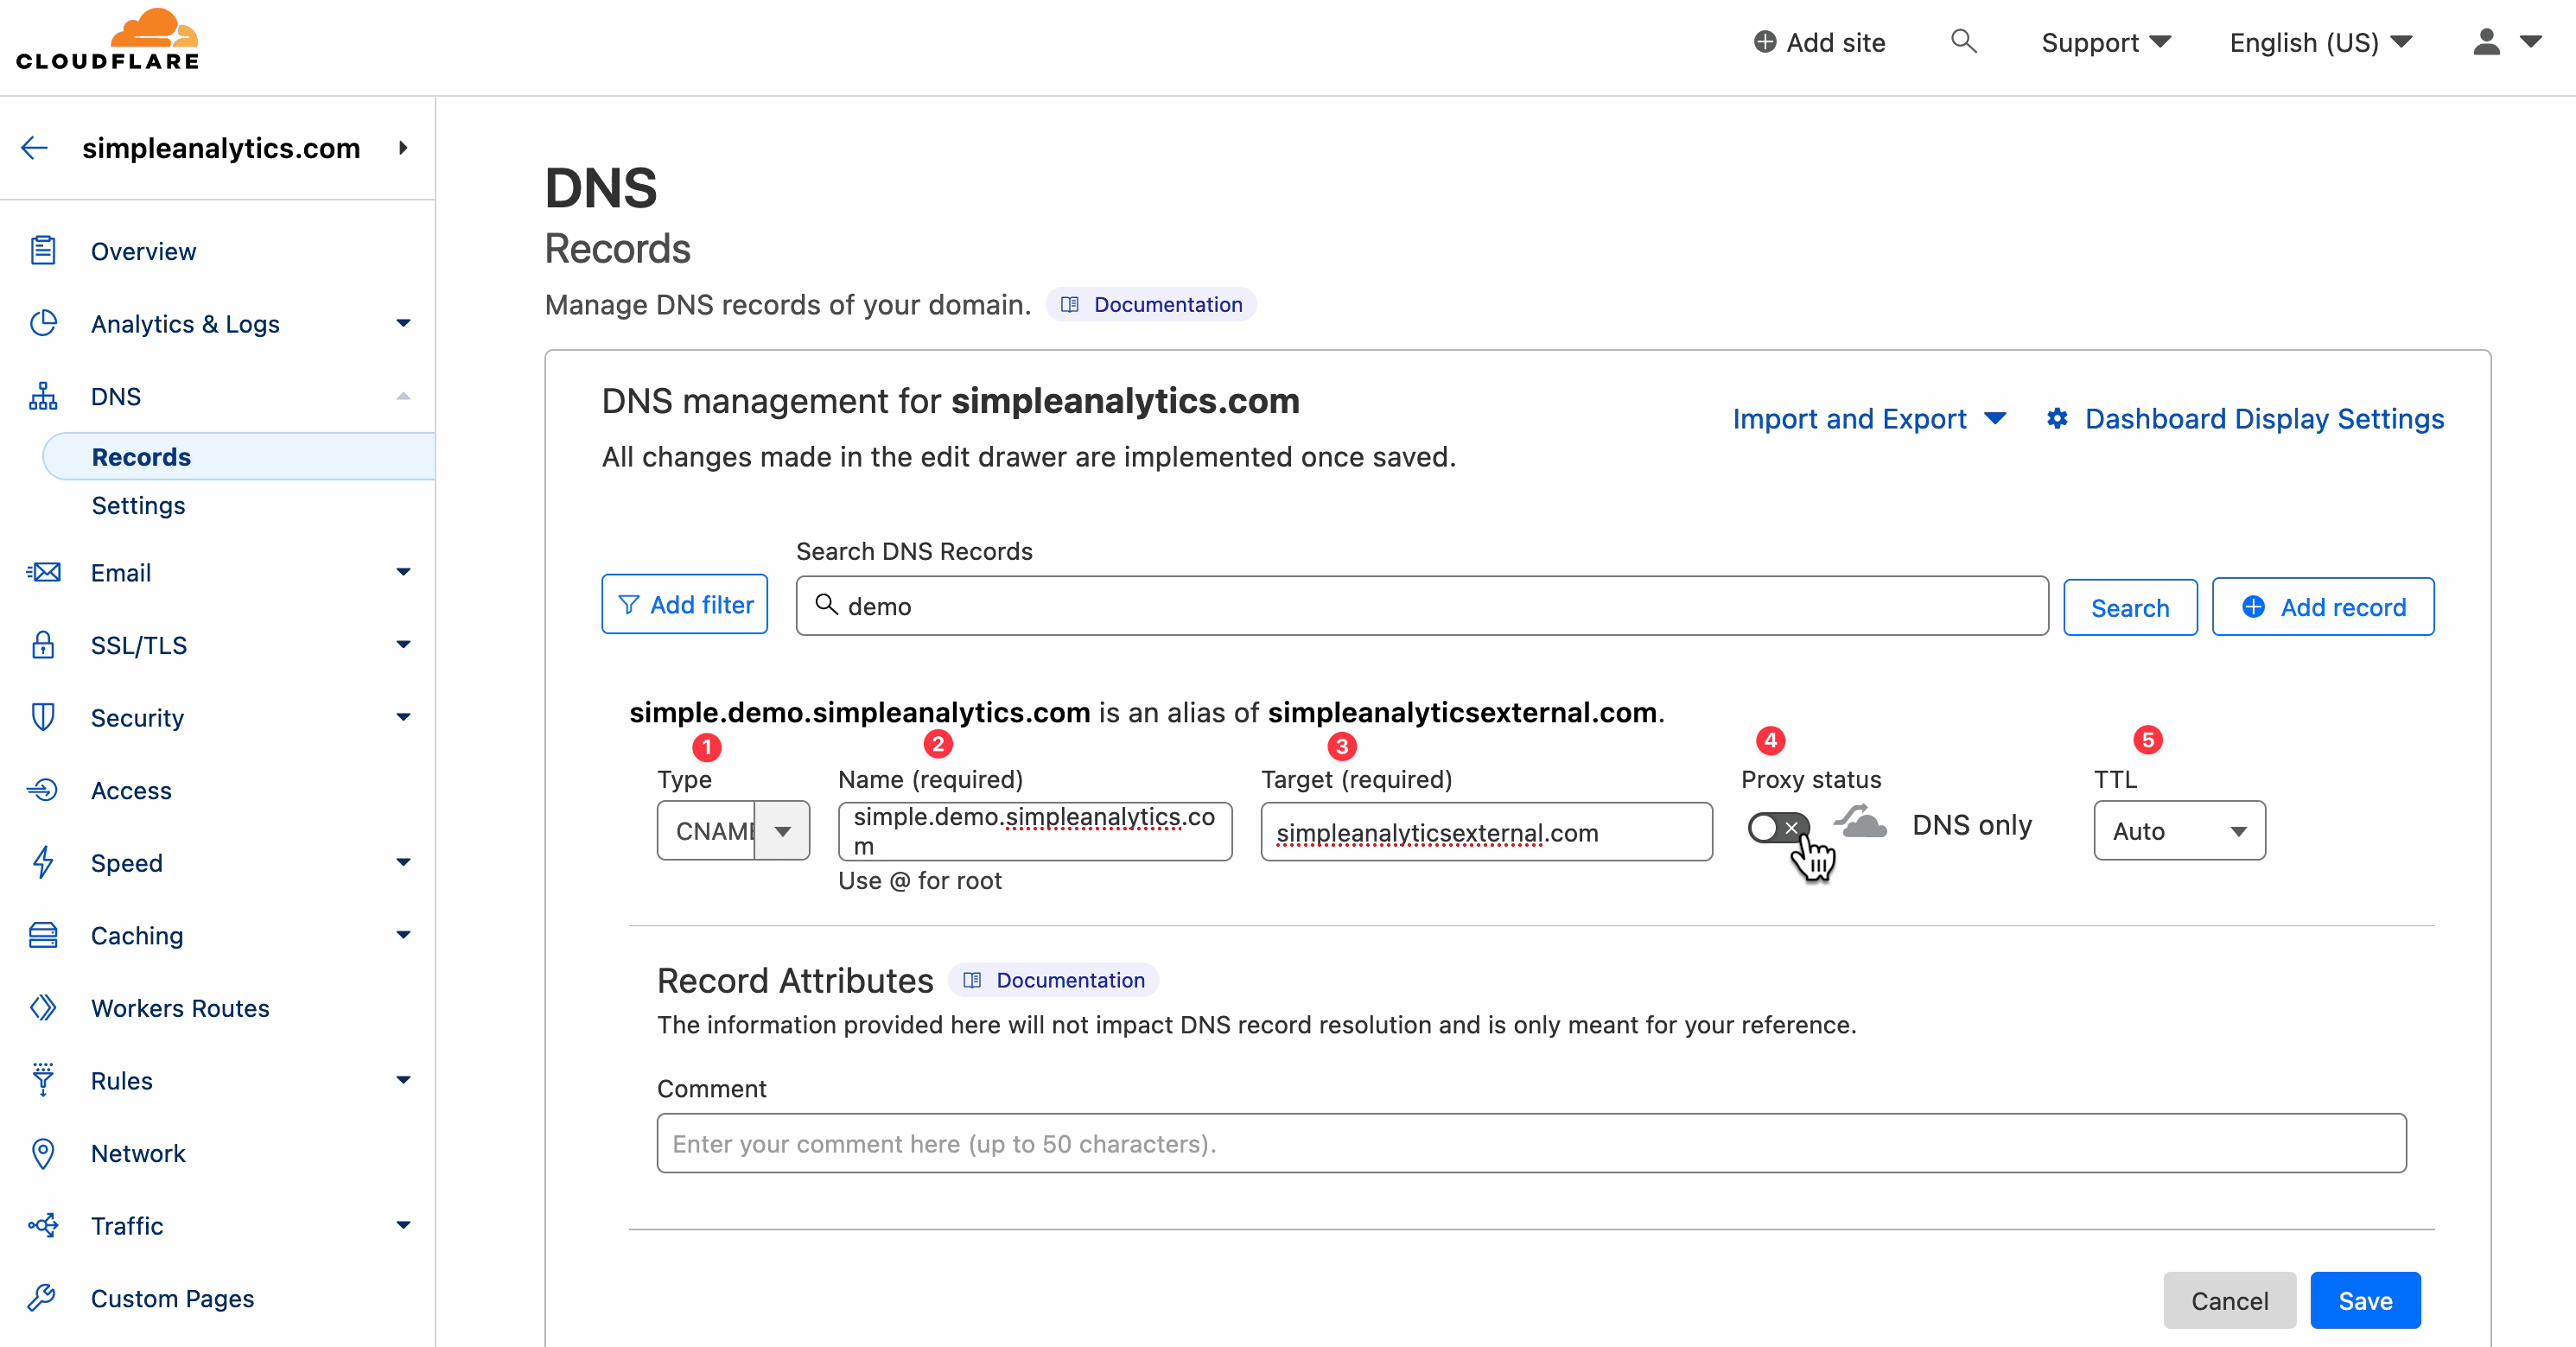
To link your custom domain to Simple Analytics, you first need to copy/paste the subdomain and select the ‘target’, which is: simpleanalyticsexternal.com and can be found here.
With Cloudflare, it's important to turn off the proxy because Simple Analytics installs the SSL certificate needed for a new custom domain. You can leave the time to live as automatic or set it to five minutes, which is usually enough as this domain is not changing many times.
To ensure that the custom domain is properly set up and working, you can visit the domain and see if it loads correctly. If you encounter an SSL error, you can simply hit refresh in your website settings to resolve it.
Checking the SSL can take a minute. Once it's done, it should be working fine. However, if you refresh your website and find that it's still not valid, it could be due to a cached SSL certificate in your browser or somewhere else on the network.
Please let us know if you still run into anything while installing Simple Analytics.