
Tracking signups should be one of your key KPIs for growth. Every (online) business should have an idea of how many website visitors actually convert into signups. It gives an understanding of the success of efforts in attracting new clients.
This article is a step-by-step guide that will walk you through the steps to create events that track signups effectively.
Before we dive in, our video meister Nick, created a super simple video explaining how to track signups in Simple Analytics. Here you go!
Signup tracking
To do this, we'll need website analytics. Google Analytics has long been the default analytics tool to do this, but since they switched to GA4, it’s become overly complex. While you can still set up signup tracking in GA4, there is a less time-consuming tool: Simple Analytics
Let's keep things simple.
What are events?
Understanding what “events” are before proceeding any further is important. They represent actions on your website, such as button clicks and page scrolling, or more advanced ones, such as signups and login actions.
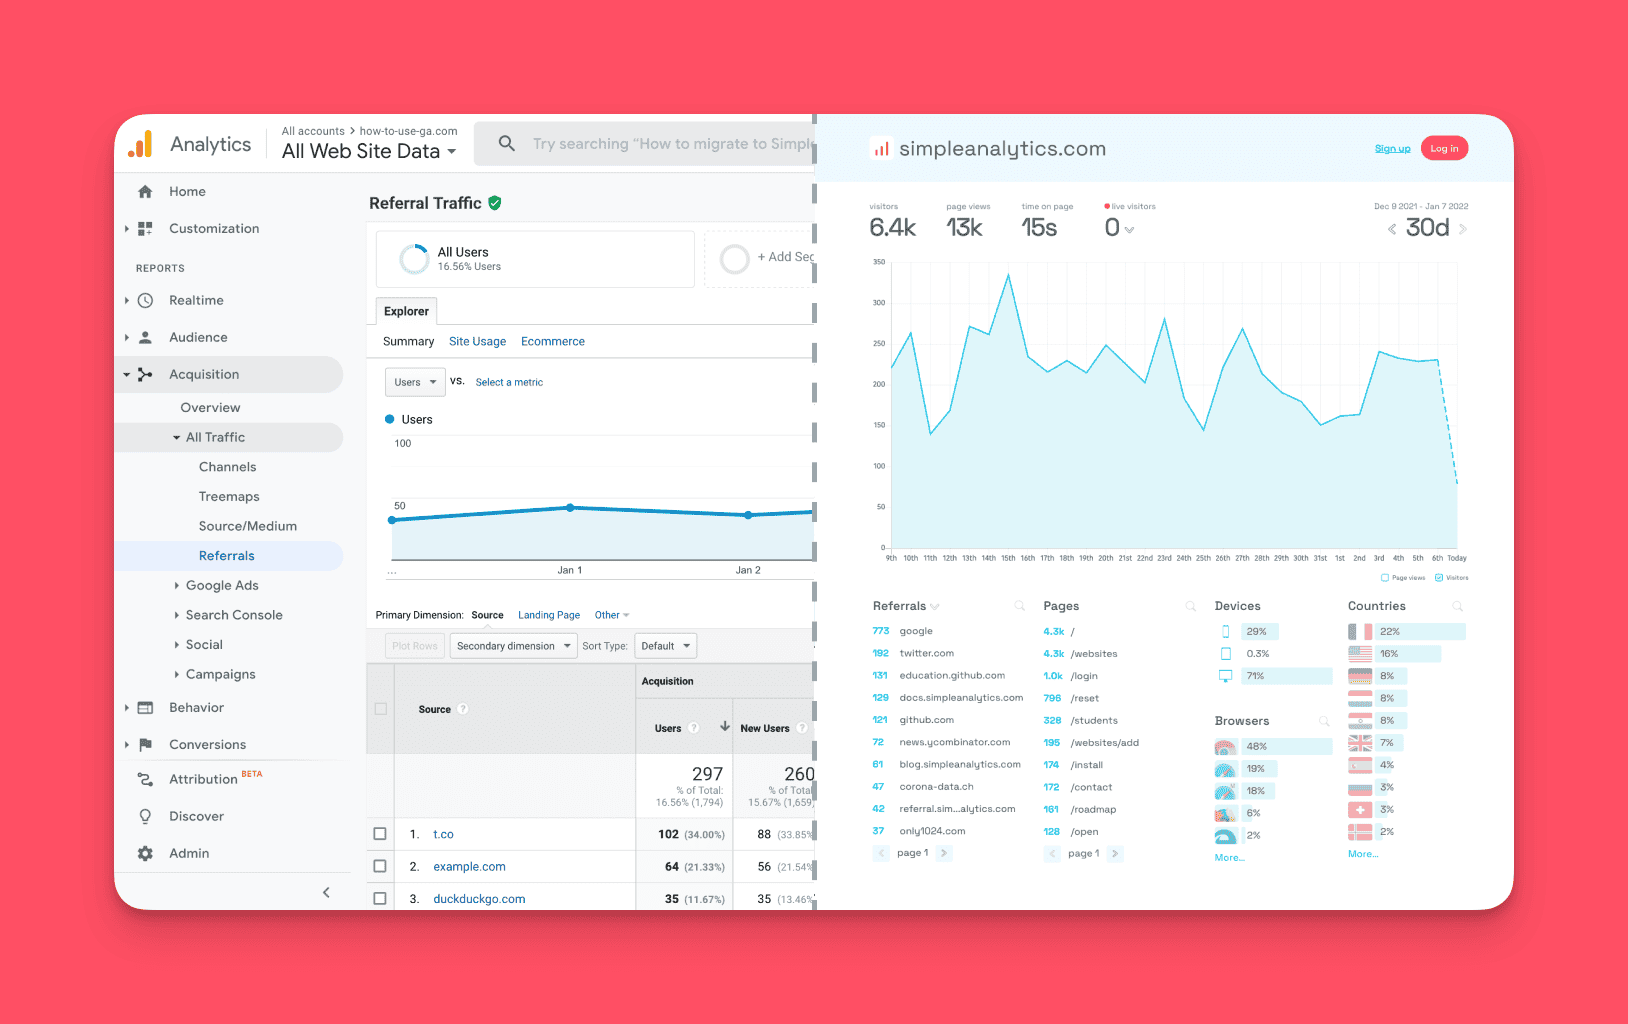
We’ll use Simple Analytics instead of Google Analytics to show you how to track signups in a few clicks. To illustrate the difference, see the image below.
Simple Analytics provides a simple JS plugin to help you track all events. There are two ways you can approach this:
Automated events: These are the ones that are automatically tracked by Simple Analytics, such as outbound clicks, emails, downloads, and a few more. This means that if you install this script, it automatically tracks all this.
Custom events: On the other hand, custom events are meant to track all other events a user might need and are user-specific, such as tracking signup or tracking payment flow.
Since we want to track signups, we must create a custom event.
Step 1: Install the Script
If you aren’t a Simple Analytics user already, you first need to install the regular script. If you’ve already done this, jump to step 2.
Start by creating your account on Simple Analytics, which will prompt you to add your website and the code below onto your website’s <body> tag.
<!-- 100% privacy-first analytics -->
<script async defer src="https://scripts.simpleanalyticscdn.com/latest.js"></script>
If necessary, you can place it in the <head> section, but remember to omit the <noscript> part.
Step 2: Create the Events
Let's add our “signup event” so Simple Analytics can start tracking and displaying it on your dashboard.
Below are two individual functions that need to be added to your website.
// Event to track button click

sa_event("click_signup");

// Event to track successful signups

sa_event("signup_success");
Remember to trigger these only when your desired event occurs. Below is the example of the button click event mentioned above.
<a class="btn" href="./signup" onClick="sa\_event("click\_signup");">Signup</a>
Once these are added, they will be sent to Simple Analytics.
Step 3: Test & Access Event Data
Now that you have started collecting the event data head over to your Simple Analytics dashboard.
Then click on the events tab, and you should see all your events there, including the ones you added.
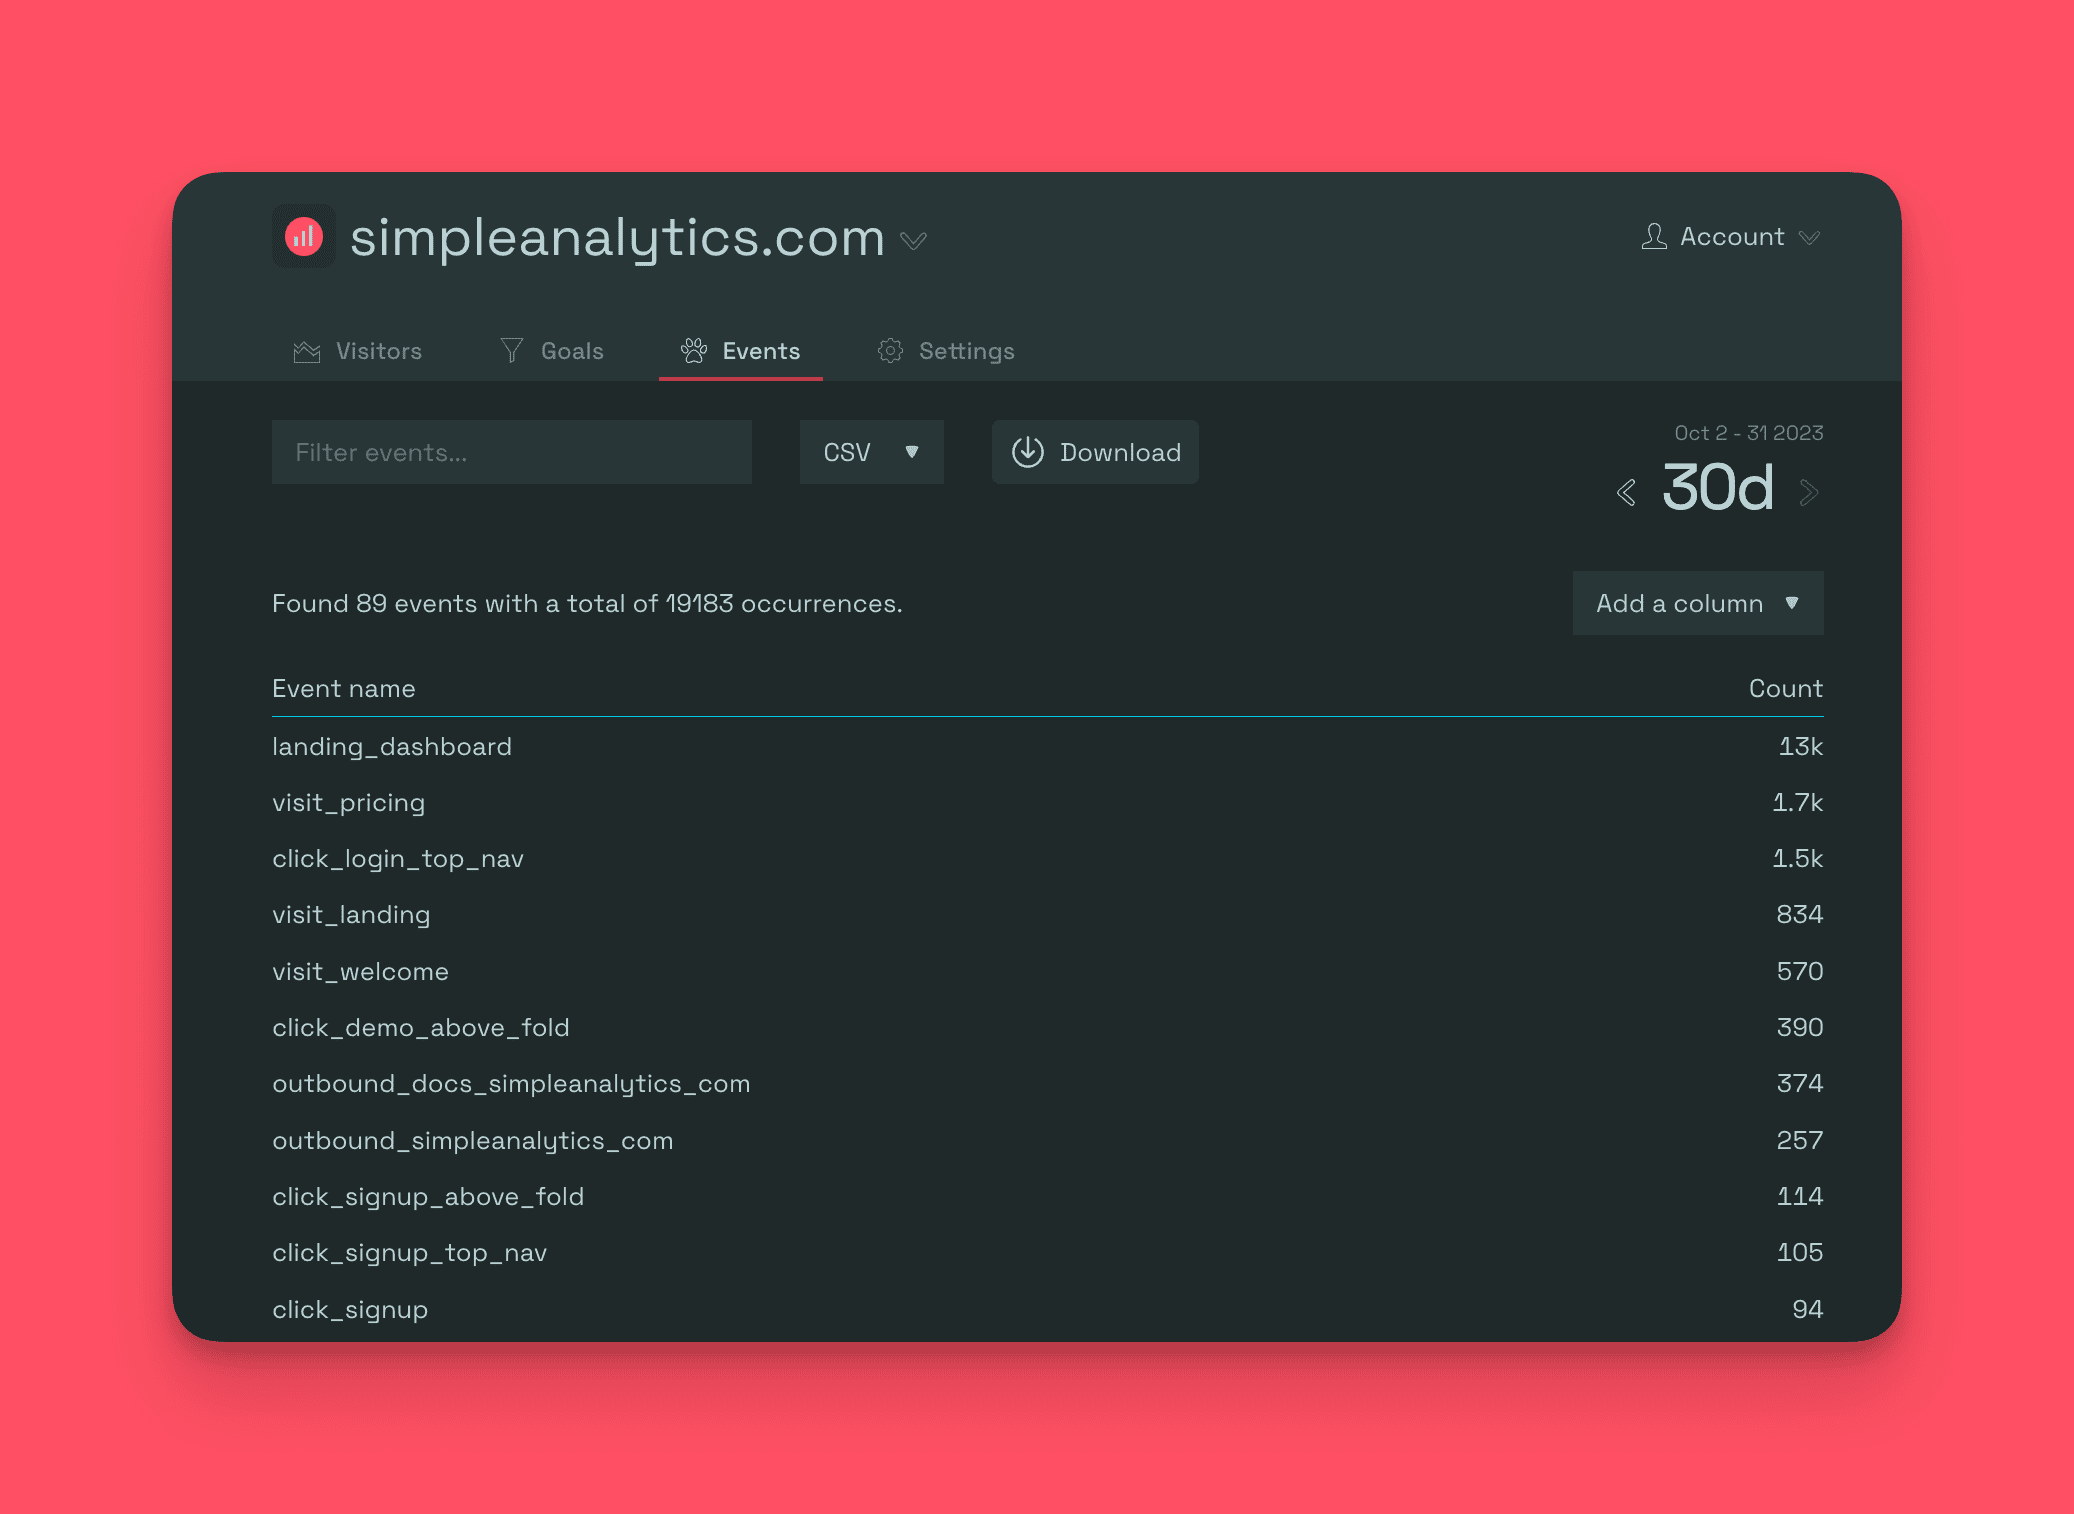
Note: Events only get added once they are triggered. If you have only just added them, you can manually trigger them once for testing by clicking the signup button and signing up.
Step 4: Create Goals
Next is the final and most important step: start visualizing your metrics using the “goals” feature.
To effectively measure the success of your signup process, create two goals based on the events:
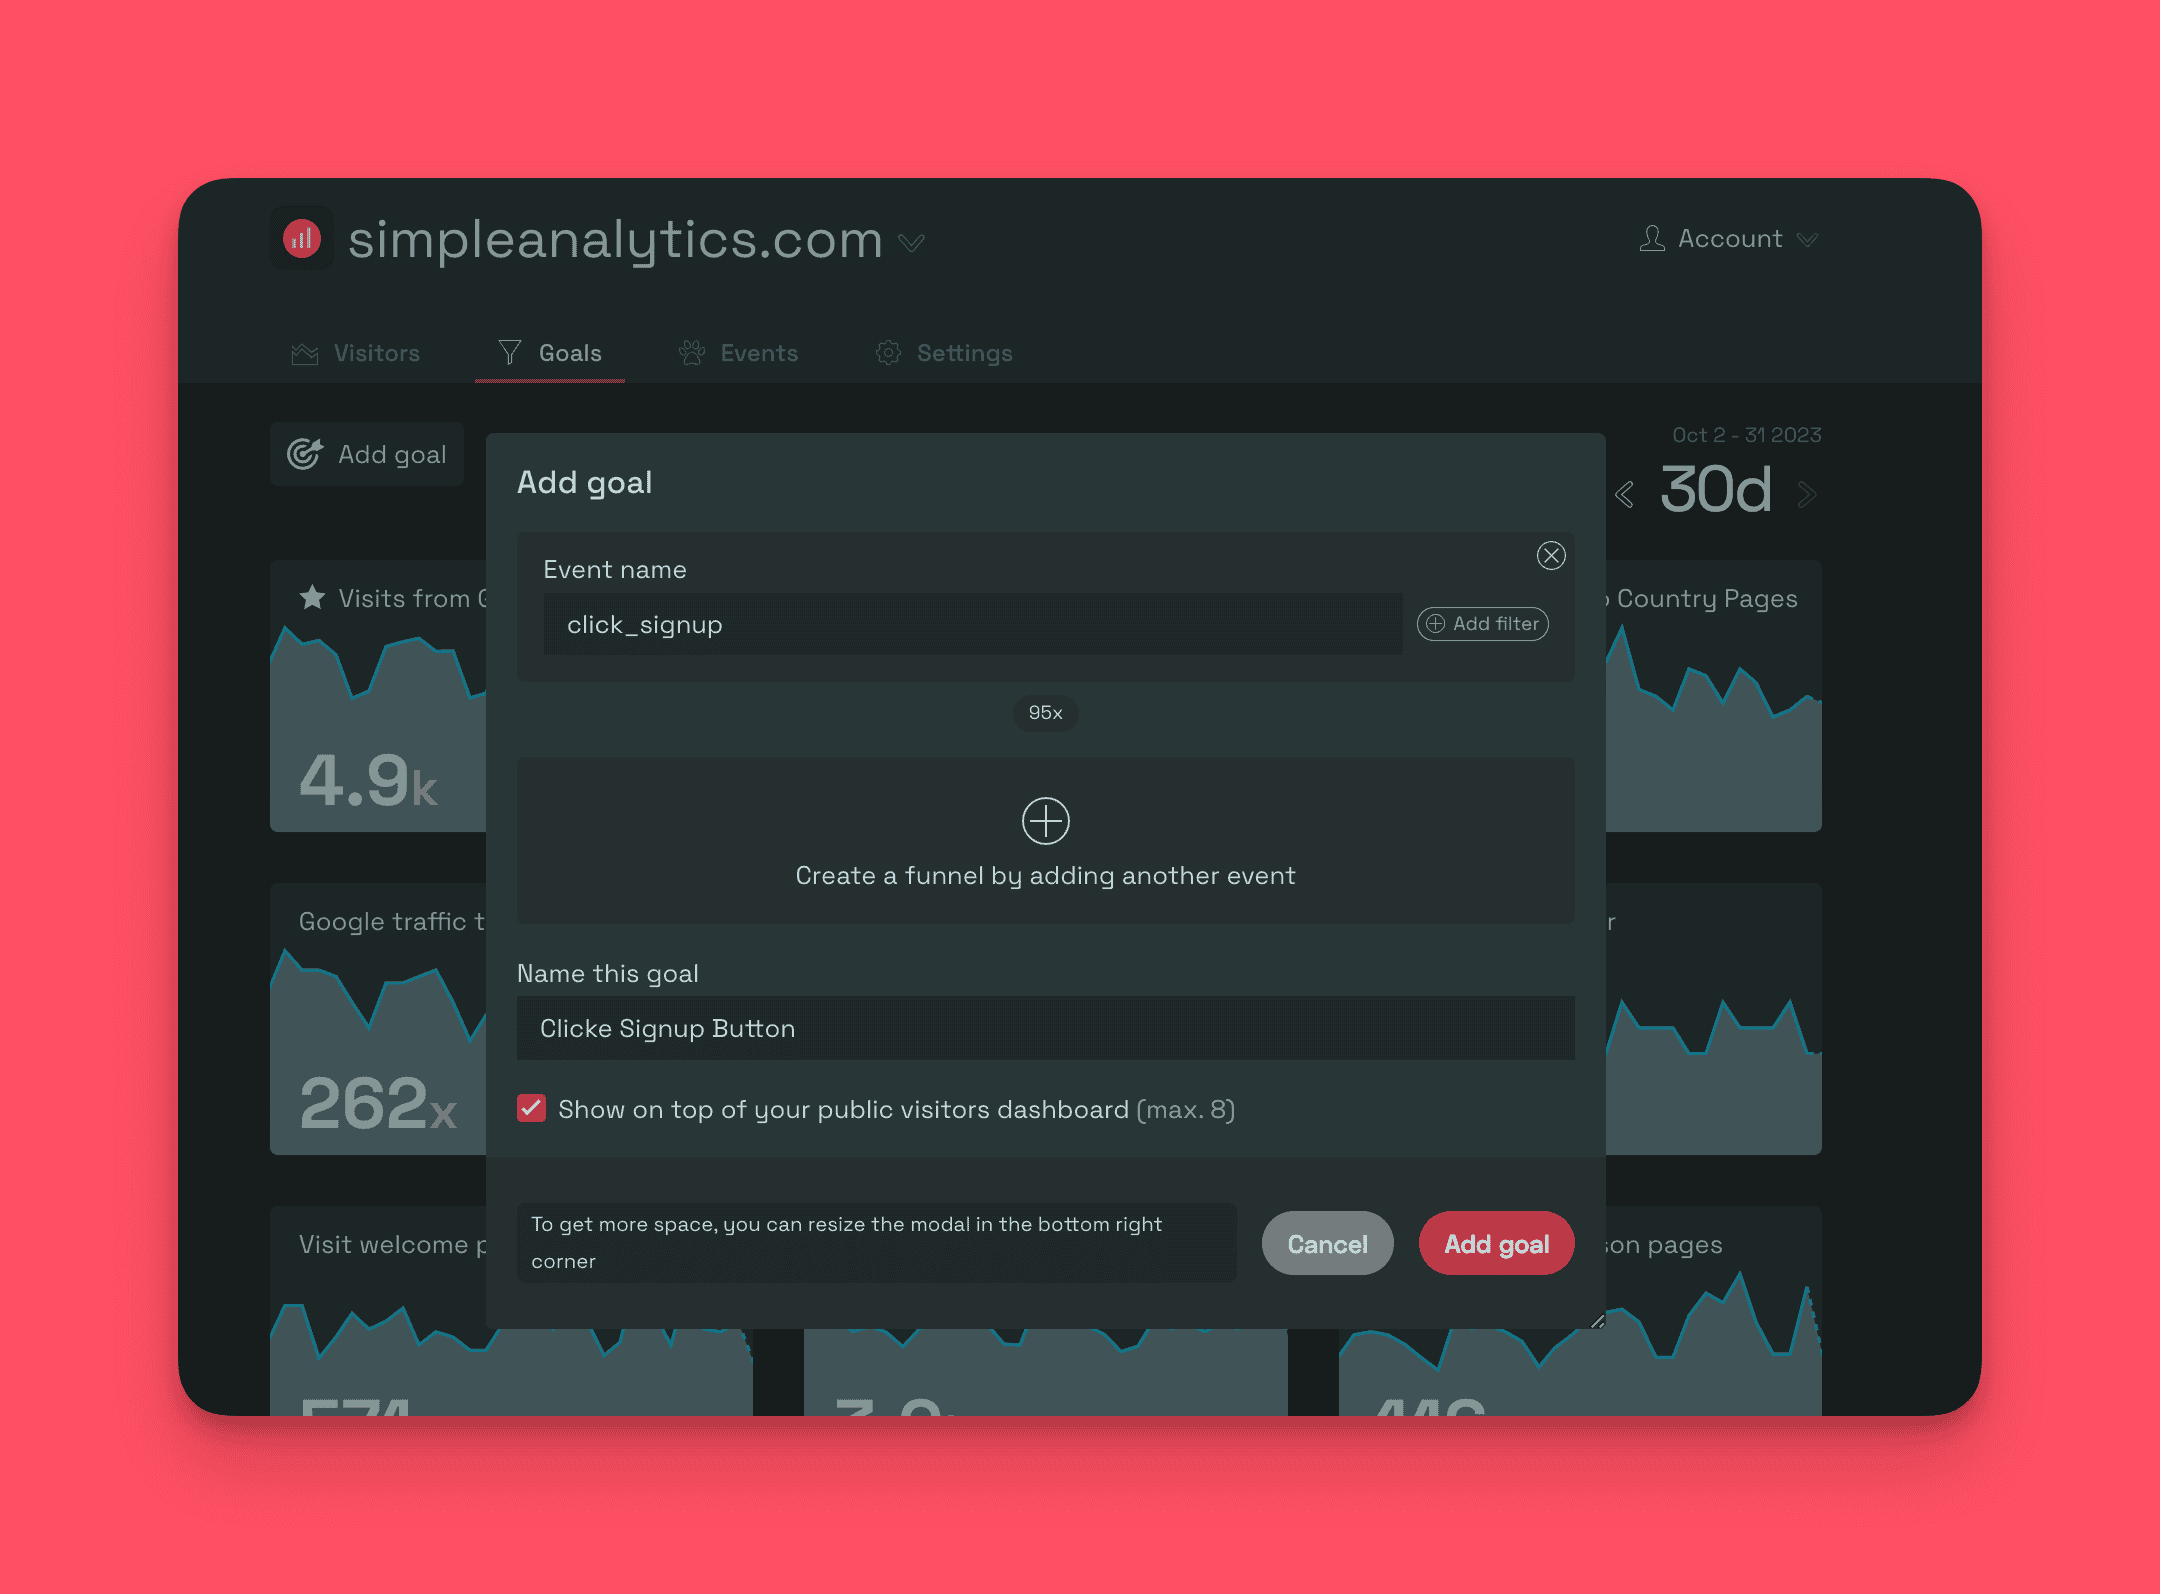
Goal 1: Clicked Signup Button
- Define the goal: Give it a name like "Clicked Signup Button"
- Set the event: Choose the event "click_signup."
- Mark the goal as important: Ensure it appears in the visitor dashboard for easy tracking.
Goal 2: Successful Signups
- Define the goal: Name it "Successful Signups."
- Set the event: Choose the event "signup_success."
- Mark the goal as important: Make it visible in the visitor dashboard for easy tracking.
By creating these goals, you can monitor the performance of both the signup button (to analyze user interest) and the signup success (to measure the conversion rate).
Final Thoughts
Tracking user signups is crucial for understanding the effectiveness of your marketing efforts and product adoption. Using Simple Analytics’ Events feature, you can gain valuable insights into user behavior in a few clicks.
Additionally, setting up goals for each event allows you to monitor and optimize your signup process effectively. With data-driven decisions, you can enhance user experience, improve conversion rates, and ultimately propel your business toward success.
No need for complex analytics tools like GA4. Let's keep it Simple.
Further reads
If you like this guide and would love to read other use cases for Simple Analytics, here’s a list you can check out.