
Implementing Google Analytics on your GoDaddy website is a strategic move to track and understand your website traffic and user behavior. This integration provides valuable insights that can help you optimize your site's performance and user experience.
Here's a step-by-step guide to adding Google Analytics to your GoDaddy website.
- Set Up a Google Analytics Account
- Obtain Your Tracking ID or Tag
- Log in to Your GoDaddy Account
- Locate the Website Editor or Settings
- Add the Google Analytics Tracking Code
- Save and Publish Your Changes
- Verify the Integration
- Final Thoughts
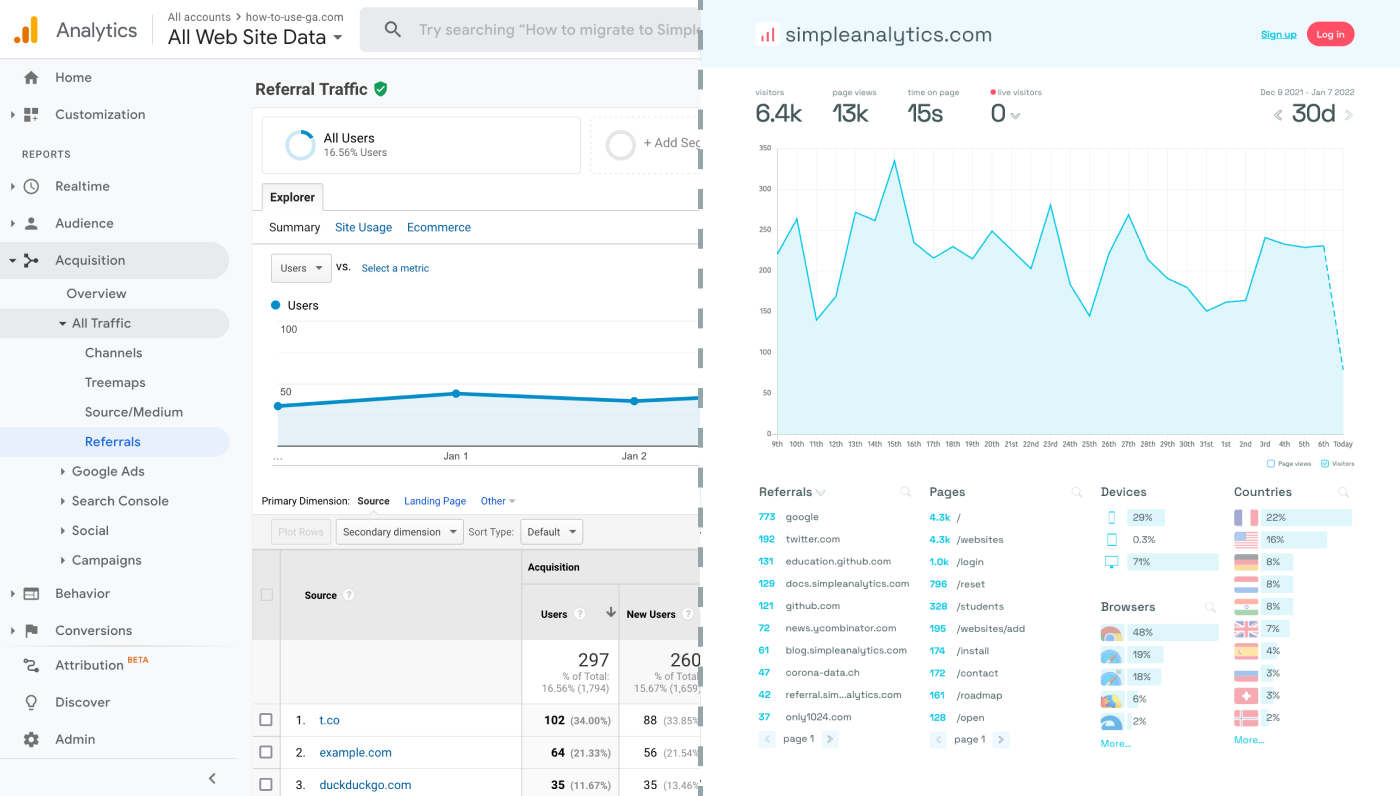
Before we dig in you need to know that Google Analytics is complex and a bit clunky. There are other options that give you the same insights in a slick and straightforward dashboard.
Simple Analytics is one of them. A privacy-friendly and simple analytics tool - just the insights you need in a straightforward dashboard. (And its also free yes).
All right, now let's get into answering your question!
Set Up a Google Analytics Account
If you haven't already, create a Google Analytics account by visiting the Google Analytics website. Follow the prompts to set up a new account and create a property for your website.
Obtain Your Tracking ID or Tag
After setting up your property, Google Analytics will provide you with a unique tracking ID or a Global Site Tag (gtag.js). This is the identifier that links your website to your Google Analytics account.
Log in to Your GoDaddy Account
Access your GoDaddy account and navigate to your website's dashboard or the website builder, depending on where your site is managed.
Locate the Website Editor or Settings
Within the GoDaddy website builder or dashboard, find the section where you can edit your website settings. This is typically in a settings or site configuration menu.
Add the Google Analytics Tracking Code
Look for an option to add external scripts, headers, or tracking codes. This is where you will insert your Google Analytics tracking code.
The tracking code (Global Site Tag) provided by Google Analytics looks something like this:
<!-- Global site tag (gtag.js) - Google Analytics -->
<script async src="https://www.googletagmanager.com/gtag/js?id=YOUR_TRACKING_ID"></script>
<script>
  window.dataLayer = window.dataLayer || [];
  function gtag(){dataLayer.push(arguments);}
  gtag('js', new Date());
  gtag('config', 'YOUR_TRACKING_ID');
</script>
Ensure you replace YOUR_TRACKING_ID with your actual Google Analytics tracking ID.
Save and Publish Your Changes
After inserting the tracking code, make sure to save and publish the changes to your website. This action will activate Google Analytics tracking on your site.
Verify the Integration
To ensure the integration is functioning correctly, visit your website and then check the real-time reports in Google Analytics. If it shows your visit, the integration is successful.
Final Thoughts
Adding Google Analytics to your website can give you great insights. However, ask yourself: is Google Analytics the right tool for you?
GA is an overpowered solution for straightforward analytics. If you're looking for a simple and intuitive dashboard with the insights you need, there are better alternatives.
If this resonates with you, feel free to give Simple Analytics a spin. You just need to add the script to your app and off you go. This takes about one minute- and there is a free version as well!
Enjoy!