
Adding Google Analytics to your Webflow site is a strategic move to gather insights and optimize your website’s performance. Here is how you can integrate Google Analytics, step by step.
Let's dive in!
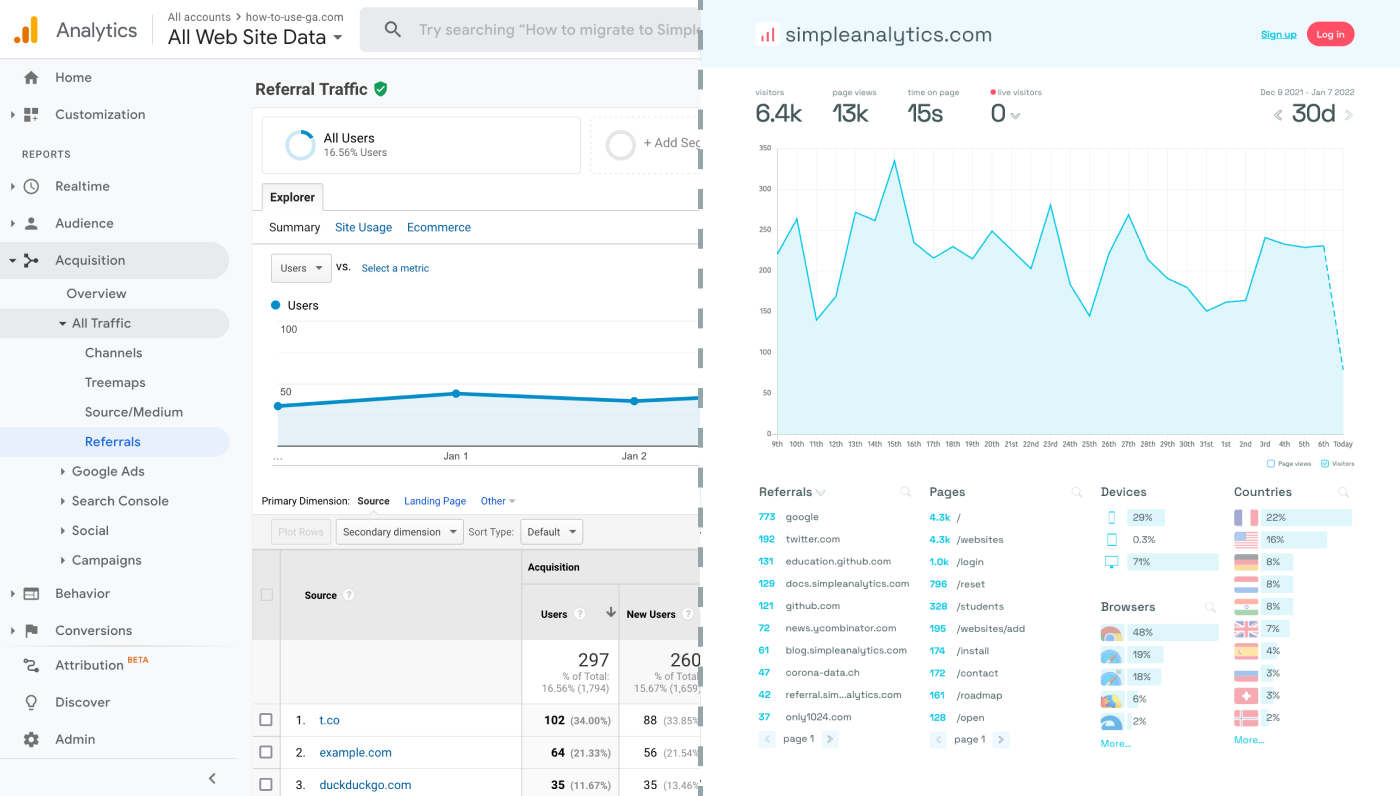
Before we dig in I want to show you something. I promise it's worth it...
Google Analytics is great, but also complex and a bit clunky. If you just want a straightforward dashboard with the insights you need, GA is not a great place to start. Additionally, Google doesn't care about privacy and GA requires an annoying cookie banner.
That's why I built Simple Analytics, a privacy-friendly and simple analytics tool - no personal data, no cookies, just the insights you need in a straightforward dashboard.
Here is how it looks vs GA. Feel free to check our live analytics to get an idea for your project. (It is free btw)
All right, enough about us. Now let's get into answering your question!
Integrating Google Analytics
Set Up Google Analytics
If you haven’t already, create a Google Analytics 4 (GA4) property for your website. Visit Google Analytics and follow the setup instructions.
Obtain Your GA Tracking Code
Inspect your property and retrieve the GA Tracking Code for your property.
Access Webflow Site Settings
Log in to your Webflow account and go to your project’s dashboard. Navigate to your site settings by clicking on the settings icon for the specific site you want to integrate with GA.
Add the Tracking Code
In your site settings, find the ‘Custom Code’ section and paste your tracking code into the ‘Head Code’ section in the Custom Code area.
Publish Your Changes
After adding the tracking code, publish your changes for them to take effect. This can be done from the ‘Publish’ menu in your Webflow dashboard.
Verify the Integration
To confirm the integration, visit your published Webflow site and then check the real-time reports in Google Analytics. If it registers your visit, the setup is successful.
(Optional) Create New Properties
To track multiple websites, create extra properties and use the corresponding tracking code. This prevents GA from conflating the data.
Final Thoughts
Adding Google Analytics to your website can give you great insights. However, ask yourself: is Google Analytics the right tool for you?
GA is an overpowered solution for straightforward analytics. If you're looking for a simple and intuitive dashboard with the insights you need, there are better alternatives. Yes, I’m talking about my own product (Simple Analytics), but there are others out there as well.
I hated using Google Analytics for my projects. It's clunky, there are hundreds of dashboards and it doesn't look appealing. Also Google doesn't care about privacy or ethics. That's why I decided to build my own and more intuitive web analytics tool.
If this resonates with you, feel free to give Simple Analytics a spin. You just need to add the script to your site and off you go. This takes about one minute- and there is a free version as well!
Enjoy!